Brief Description: setting up for first skin instal
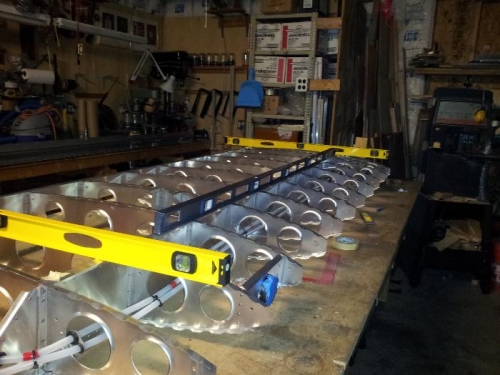
1) laser sighting the main spar for straightness. Note again the holding block screwed to bench top. About two thirds the way towards the inboard end, there is another support to 'pull against to remove the small warp of the spar, and the inboard most end is securec with another support. The laser is sighted doen the middle of the spar using the tip of the machined angles on the spar from aft to forware and fwd to aft. I had to draw a more decernable line to make sure I got the bow out with out inducing a wiggle in the spar. It looked good to me.
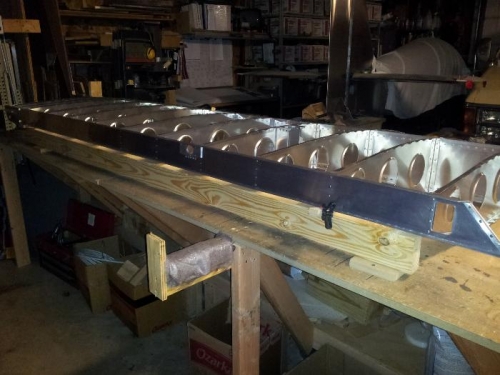
2)This is the method I used to level the rear spar front to back and in to out, again screwed to the bench top. the aforementioned bailing wire isnt in place yet.
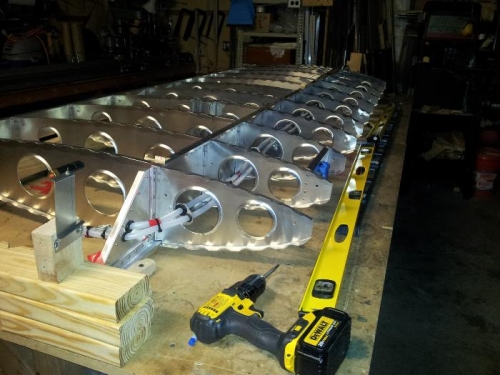
3) The all important level test. all three levels show agreement with level.
Side note. The cheap levels I got..yellow ones.. should be checked between themselves so as to be sure they both read the same thing at the same time. I marked one end of each with A and the opposite end with B after I found which end allowed both to read level at the same time in the same place. That way, I should not induce an error from the small varriances between the levels them selves. The master level it the long one and the short ones were placed on its top to do these checks. there was about 1/16 inch difference in one level. all levels are considered at level when the bubble is in the exact center between the lines. with a good level the miniscus of the bubble will just touch the lines at either end when level.cheap ones leave about 1/32 between bubble and level lines.