
|

|
|
|
Jim's Web Site
|
Date: 6-6-2014
|
Number of Hours: 3.00
|
Manual Reference:
|
Brief Description:
|
|
Today I continued balancing the aileron. Started by bolting the first weight to the inboard side of the aileron tab, then I cut enough of the second weight to take up the rest of the inboard tab not covered by the first weight. I knew that the tab as it goes outboard gets more narrow. Next I bolted on the remaining part of the second weight, proceeding outboard. Next was trying out the aileron, with the weights, for travel. As I thought, the untrimmed second weight prevented full travel, so I had to shave off some of the front of the weight. My woodworking plane works perfectly on lead. Well, that process had to be repeated quite a few times until I achieved full travel. Determining required travel involved mounting the wing tip, matching the aileron trailing edge to the tip trailing edge, then measuring the angle of the aileron as a base measurement. Then I added the specified travel, both up and down, to get my target final angle in the most upward and downward positions. All of that took a lot of time, but I finally got what I was looking for.
So travel is ok, but balance is now off, due to the required trimming. I figured that would happen, so that's why I left room on the outboard part of the tab. Tomorrow I'll have to do some more trimming of the weights, to allow for the thickness of the 3 bid that is used to further secure the weights. More fiddling.
|
|
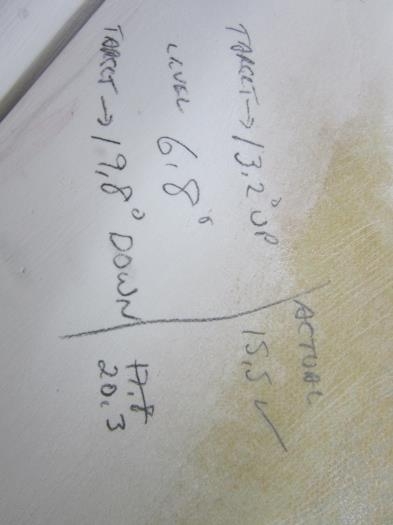
Aileron travel notes
|
|
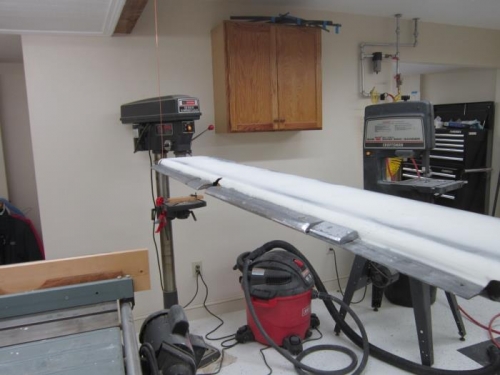
Aileron hanging from the ceiling beam
|
|
|
|
|
|
|
|
|
Copyright © 2001-2024 Matronics. All Rights Reserved.
|