
|

|
|
|
Jim's Web Site
< Previous Log Entry
Next Log Entry >
|
Date: 5-27-2012
|
Number of Hours: 5.00
|
Manual Reference:
|
Brief Description: Servo inspection panel and first capstrips
|
|
This morning I sanded the micro on the left lower skin where the servo inspection panel will be located. Next, the manual calls for a segmented cut around the perimeter of the panel, which is shown in image 1 below. Image 2 shows the flange, made of 4 bid. It overlaps the panel by 3/4 inch, which later will be reduced to 5/16 inch.
While the flange was curing, I placed my first capstrips on the right elevator. The first step was to peel off the three layers of duct tape from the upper skin at the rib and spar intersections, then replace that with one layer of duct tape and a layer of release tape. Next I placed two inch wide 2 bid tapes over the duct tape and release tape. After placing a thin layer of micro on the ribs and spar, I placed the upper skin, with the capstrips hopefully staying put, on top of the lower skin. I clamped the trailing edge, and used all available weights to ensure bonding a the rib and spar locations. We'll see tomorrow.
|
|
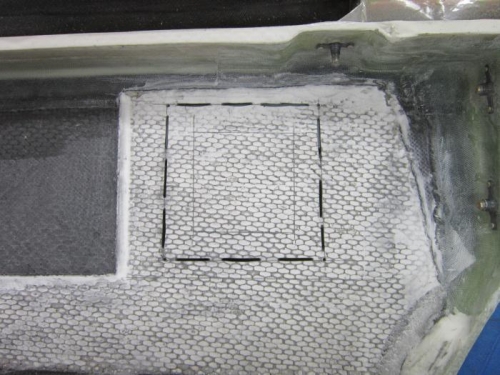
Inspection panel segmented cut
|
|
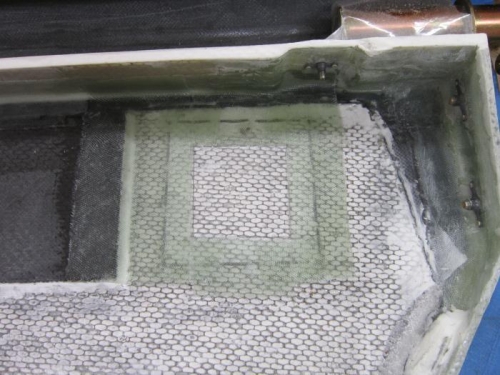
Flange installed
|
|

Right elevator
|
|
< Previous Log Entry
Next Log Entry >
|
|
|
|
|
|
|
Copyright © 2001-2024 Matronics. All Rights Reserved.
|