
|

|
|
|
Jim's Web Site
|
Date: 5-3-2012
|
Number of Hours: 1.00
|
Manual Reference:
|
Brief Description: Final elevator rib construction
|
|
Tonight I finished fabricating the last two ribs. In case someone else needs to do the same, here's how I did the ribs:
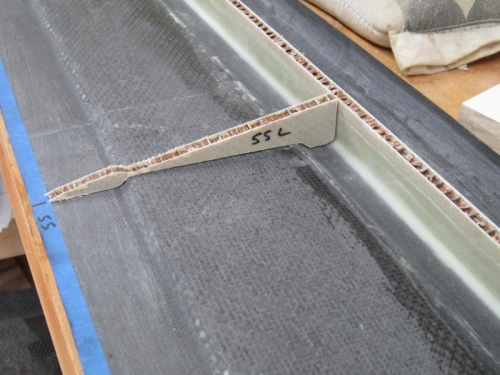
First I used the largest contour guage I could find, and 11 inch model, to get the shape of the lower skin core reinforcing as it relates to the skin. To ensure a flat elevator, I first set the skin on my maple top woodworking bench, and weighed down the skin with shot bags. Next I transferred the shape to a piece of appropriate prepreg and cut the bottom shape, sanding as necessary to get a good fit.
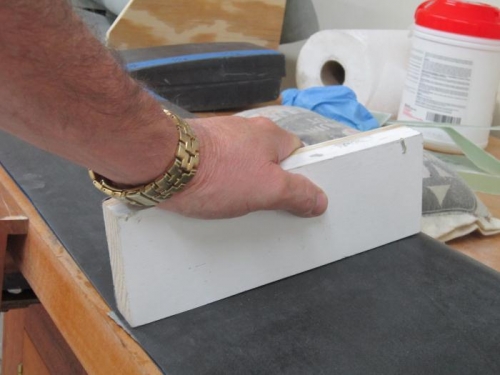
Next I repeated the procedure for the top skin, as the bottom and top cores are not identical. Then comes the trial fitting of the top and bottom skins. Remember that there are three layers of duct tape on the top skin where the cap strips will go. First I checked the fit, and if the top did not fit the bottom, I peeked inside with a flashlight to find out where the interference was, and sanded by hand appropriately. After getting a good trial fit, I bore down on the top skin where the rib was with a flat and straight piece of wood, as shown in image 3. The purpose of this was to make sure that the top skin was straight from fore to aft, and that the trailing edge was approximately 1/8 inch thick, without any concavity or convexity of the top skin.
When this was done, I removed the top skin and verified that the rib met the top skin by verifying indentations on the duct tape attached to the underside of the upper skin. All looked well with all ribs, so next project, probably this weekend, is to begin bonding the ribs to the lower skin.
|
|

Contour guage
|
|
Checking rib fit
|
|
Final rib check
|
|
|
|
|
|
|
|
|
Copyright © 2001-2024 Matronics. All Rights Reserved.
|