
|

|
|
|
Building Integrity
|
Date: 11-18-2014
|
Number of Hours: 2.50
|
Manual Reference: Section 2
|
Brief Description: Bath Time!
|
|
The Engine hasn't been Running Extremely smooth or powerful and it's not anythings fault quite yet. The prop selection still hasn't shown a strong enough static run, but with the massive speed envelope of this airplane, it may just end up being that way. However, in the event that it's engine related, I thought it would be wise to start by a thorough bathing!
In under 3 hours I had all 6 fuel injectors removed and cleaned up, along with their portion of the intake manifold. At first glance I assumed it would be major surgery to get these things off the engine, but it was really simple.
I watched a few YouTube videos on how to clean injectors at home without spending a fortune on equipment or a professional shop and I was able to clean mine for less than $10 using a can of Seafoam. The can in the picture was a throttle body cleaner that I didn't use because I've heard so many good things about SeaFoam. Anyways, The injectors came with a small plastic cap to keep them clean until installed, so I drilled a small #45 hole in the top, pressed the red straw into the hole and was able to pressurize the injector this way. Awesome! I then found that an RC deans Connector would press nicely into the injector plug and stay put for running some voltage to it. I then taped a 9V battery to the wire ends which opened the injector while I sprayed the SeaFoam through the injector. I also sprayed it in reverse to clean both ends.
I'm confident that after these have soaked overnight, that they will be free of all gunk by the time I fire up the engine again. Fuel Pressure should do the trick! Now I'm hoping for a few more RPM and a smoother throttle transition from idle to full. We'll see!
|
|
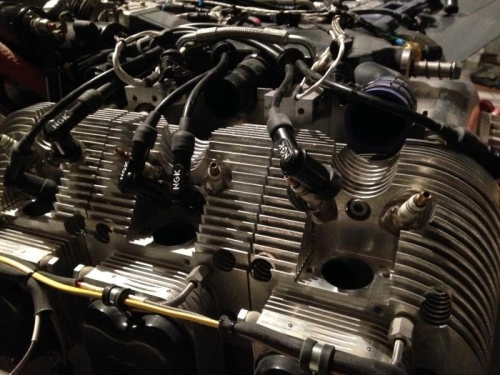
Injectors and manifold removed
|
|
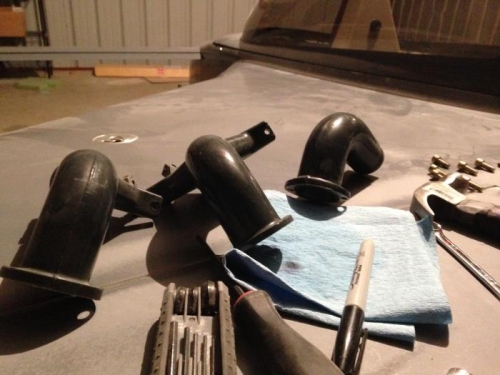
intake manifold parts to be cleaned.
|
|
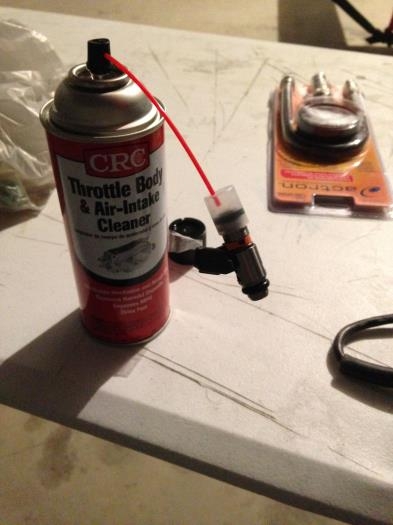
The contraption
|
|
|
|
|
|
|
|
|
Copyright © 2001-2024 Matronics. All Rights Reserved.
|