
|

|
|
|
Building Integrity
|
Date: 7-30-2014
|
Number of Hours: 6.00
|
Manual Reference: Section 2
|
Brief Description: Plug Wire routing and plenum prep
|
|
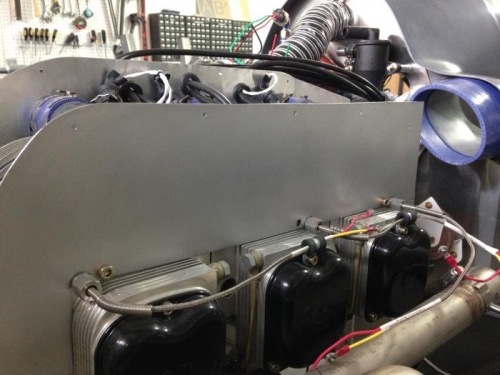
The plenums will remain a 2 part look although they will be riveted together. The idea of painting the aluminum an accent color was an option, however after a few years of oil and fuel, the paint will start looking bad. I opted to sand them from 180 grit up to a red scotchbrite. The Red pad seems to give such an even satin sheen to everything that it's my go-to for anything unpainted.
I then began drilling and clecoing around the adjoining perimeters in prep for flush rivets. Now that the aluminum is ready for install, I need to route all the wires and assemble the spark plug boots with the base attached. As soon as the wires are complete, the glass portion of the plenums will be filled and sanded again, then permanently riveted to the aluminum base.
Note: I placed the blue silicone couplers onto the intake tubes and found that they are too think to allow cowling lip clearance. For me, this was the last straw in a long debated thought to change the geometry of the inlets. When I built the inlets, the engine wasn't installed and I "guessed" on the angles. Well now I see that if I raise the deck angle by just about 2 or 3 degrees, I will have a much smoother cowling contour overall and the look will be even better. So this was my final Q to go ahead and do it. This means adding BID tape to the lip, then sanding off the underside until the cowling will clear the silicone and the deck angle matches the rise in cowling humps. Not a HUGE job, maybe a couple days, but well worth it when it's done and looking good.
|
|
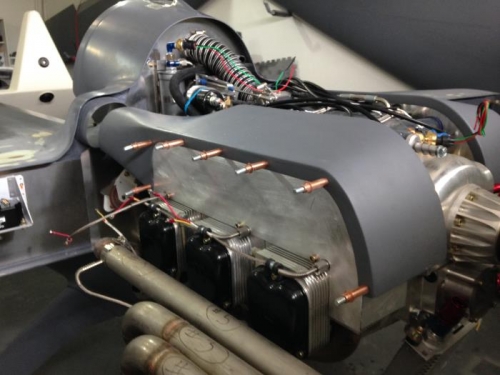
Locations for rivets
|
|
Red Scotchbrite finish
|
|
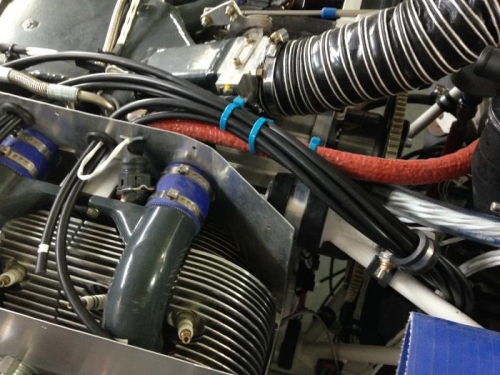
zipping the plug wires
|
|
|
|
|
|
|
|
|
Copyright © 2001-2024 Matronics. All Rights Reserved.
|