The canopy latch instructions are minimal but I found a couple of web sites and some postings on VAF I think when you get to this stage of the build most things can be figured out.
PREP
You will need a 8-32 tap for the handle. The kit includes an AN509-8R14 countersunk screw but with the shaping required at the leading edge of the handle I used an AN526C-8R16 (no 14 available), which I think is quite neat.
The brass bushing did not fit on the handle so I used a dremel drum sand tool on the inside of the bushing. Also the same bushing does not fit into its slot on the latch arm so I carefully filed that just enough so as not to remove any of the over centre cam.
FIT
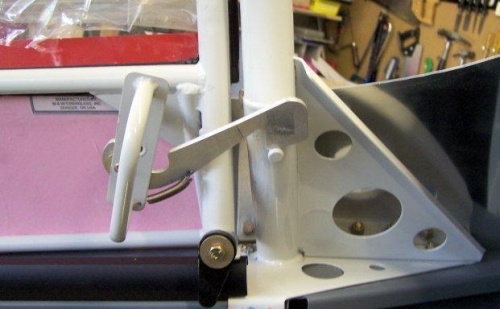
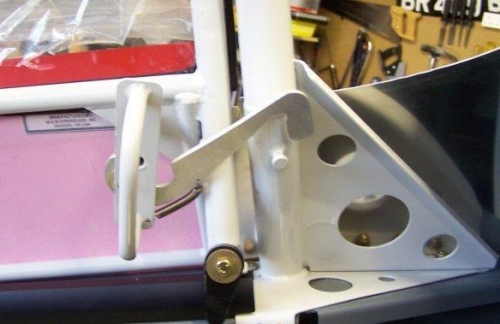
I did not devaite from the instructions. A trial fit showed I had to remove at least a 1/4" from the ebow of C-654-1 and then it was a case of removing a little at a time. Once I had the inside of the elbow clearing the welded pin I just used a round file and moved forward - this seems to give it an added "hook". You'll know when you have got it right because after you've closed the canopy as per the instructions the locking action pulls the canopy slighly forward then as the cam goes past the over centre the canopy slips back to the initial closed position.
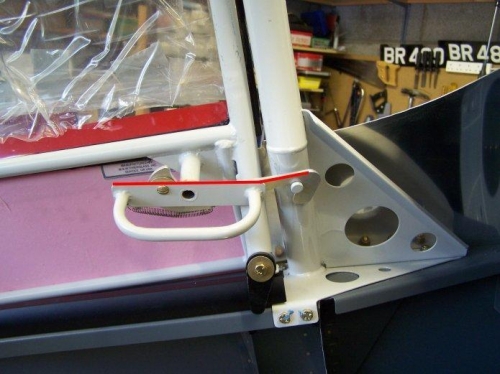
I also bent the forward section of the latch arm to sit nicely over the centre of the welded pin for optimum alignment. (see red line in photo 3).
DWG 44 gives no location for the spring holes but you quickly work out where they should go.