
|

|
|
|
Jims RV-8
|
Date: 7-27-2013
|
Number of Hours: 7.00
|
Manual Reference: 7-5
|
Brief Description: z-brackets measured, drilled...Left Tank clecoed
|
|
Part of what I like about life - and building airplanes is listening and learning. Since I already know what I know, I like to learn form others...that's why I listen more than I talk. My buddy Skyking Bob had some business fairly close by this week so he was able to drive down for a day of building assistance. Bob is one of thise "jack of all trades" kind of guys...he had a machine shop, does all of his own maintenance, etc.
It was just a good education for me to see the way someone else approaches a problem and solves it with the tools at hand. Bob probably thinks I just make him do the tedious/hard stuff but it really is interesting for me to learn from what Bob knows...Thanks Bob, for the extra hands, and the knowledge transfer.
Back to measuring the z-brackets, Bob made quick work of the marking of the z-brackets using the 5x glasses and the precision ruler (see pic #1 below) - then I would drill the center hole - we knocked out the 14 z-brackets pretty quick. Then we bolted the z-brackets to the spar, making sure the brackets were perpendicular to the spar flanges. With the z-brackets bolted down, we match drilled the other 2 holes from the spar/z-bracket. With 3 holes in each z-bracket, it was time to install the platenuts. Three platenuts installed on each z bracket, means 6 holes drilled and countersunk for each bracket. Throughout the whole process Bob and I would seperate duties and go into assembly-line mode to divide and conquer the work. Platenuts installed, it was time to bolt all 7 (per wing) z-brackets to the spar and then set the tank assembly on top of the spar and check the gap with the outboard leading edge (Pic #2).
After placing the tank on the spar - I was amazed at how well the tank fit next to the leading edge. I guess I shouldn't be amazed, this is a very well designed airplane kit and it goes together very well. A ton of progress made today and it was good to get over a major hurdle in getting the z-brackets done!
|
|
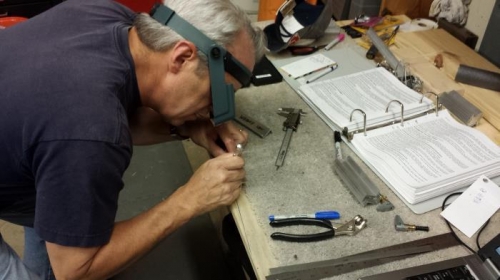
Bob making the precise measurements
|
|
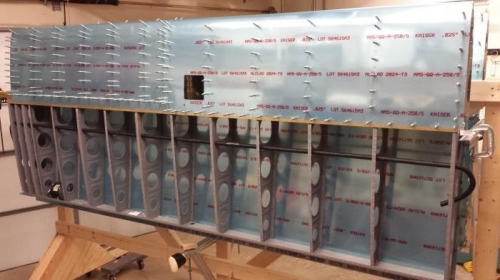
left wing looking very wing-ish
|
|
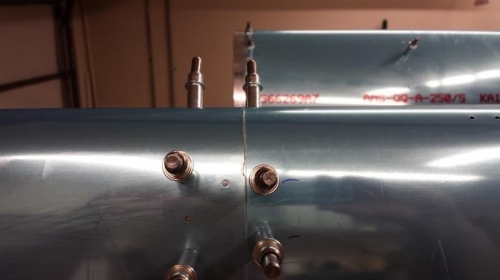
lovin' the no-gap...awesome fit!
|
|
|
|
|
|
|
|
|
Copyright © 2001-2024 Matronics. All Rights Reserved.
|