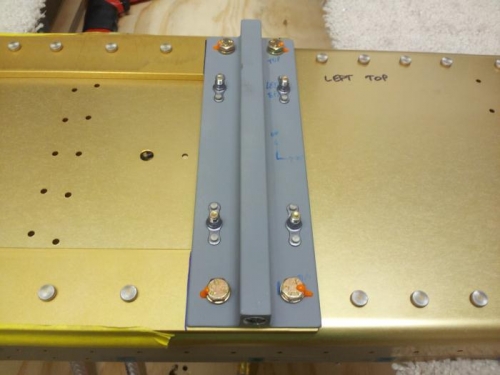
Brief Description: Tie-down assembly bolted to spar
Tonight I was able to rivet the spacers-tie down-platenuts to make it an official tie-down “assembly”. Then I tapped the 3/8” hole in the bottom of the tie-down assembly to accept the tie-down ring. Once that was done, I bolted the entire “assembly” to the spar (one for the left, and one for the right) and torqued the nuts!
The last step in “Preparing the Main Spar” section of the plans is to drill the hole in the spar for the wiring for the stall warning horn, but since I am going with a AOA (Angle of Attack) indicator instead, I don’t need the stall warning wire hole… Done with the first section of building the wing!