
|

|
|
|
Jims RV-8
|
Date: 5-3-2013
|
Number of Hours: 4.25
|
Manual Reference: 7-2
|
Brief Description: Riveting on the tank platenuts
|
|
Since the countersinks were done it was time to rivet on the platenuts. It was not a big deal with the pneumatic squeezer so I was able to get all of the tank platenuts installed. Like I said it was no big deal, just took time. There are 120 (30 each for top/bottom/left/right) tank platenuts and there are 2 rivets affixing each platenut to the spar... Cleco the platenut thru both spar holes and the platenut for 30 platenuts, remove one cleco, insert rivet, make sure it sat flush with the spar - squeeze said rivet - rinse, repeat.
I made this process more efficient by clecoing all 30 platenuts (60) clecos to one spar side to get a good fit on the platenuts and then immediately removing the right cleco on each platenut, then I would insert a rivet, check it for flush, then squeeze it, then pull out the left cleco and repeat the process for the next 2 rivets at a time... it was much faster doing two rivets at a time that way.
Next I started countersinking the main screw holes with my cordless drill. The plans don't mention exactly what the counter sink specs should be, other than it should be made to fit the dimpled skin that fits over it, and the #8 screw that holds the tank on - but there was a spec given in the "RV-ator" publication that it should be between .365" and .375" (inches) so I settled in the middle at .370". I naturally started out a little shallow and dialed the counter sink cage into .370 They came out nice as per Van's plans (see previous post about method debate) using the slower cordless drill.
I was able to get the right spar done before calling it for the night.
|
|
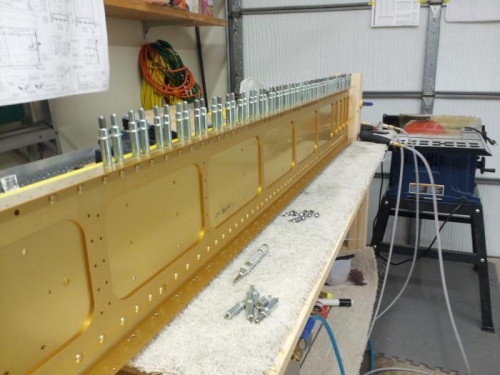
30 platenuts cleco-ed up!
|
|
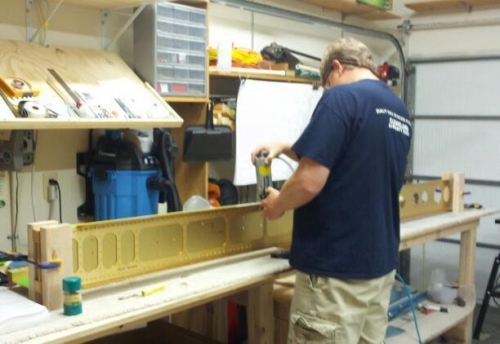
Squeezing platenut rivets
|
|
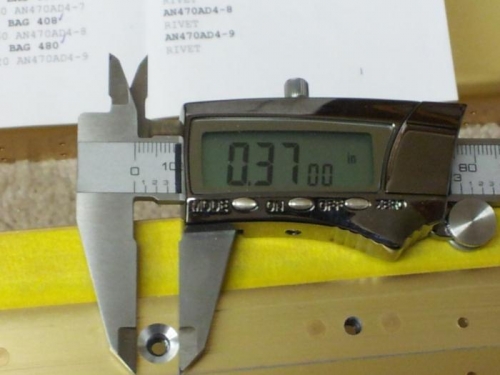
.3700" on the button, this CS passes!
|
|
|
|
|
|
|
|
|
Copyright © 2001-2024 Matronics. All Rights Reserved.
|