
|

|
|
|
Jims RV-8
|
Date: 3-5-2018
|
Number of Hours: 2.60
|
Manual Reference:
|
Brief Description: Fiberglass console storage
|
|
I had a good discussion with my Glasair buddy, Greg - who is the fiberglass king - since he's building a Glasair Sportsman 2+2. He gave me lots of good ideas and helpful hints and then walked me thru the process of laying up the fiberglass. Since I likely was using an open cell foam, I needed to first mix a slurry of epoxy, hardener and glass bubbles to lay down a layer that will be semi-easy to take off when it comes time to remove the form. The glass bubbles make it easier to sand and clean up - otherwise the layout would soak into the foam and be hard to separate/sand off.
In my mind, I would mix up a nice slurry, spread it ever so thinly onto the form and wait overnight before laying on the layers of fabric...at least that's how I envisioned it. The reality was more like a white messy mix going on messily! Greg and I never talked about how you hold onto a semi-slurried fiberglass part while prepping it. It's like trying to hold a basketball while painting it with catchup... as you paint one area, you are simultaneously messing up 3 other areas... It was pretty comical, but I wasn’t stressed.
At this point, I figured, why waste an overly excess amount of slurry - let's use some glass fabric to soak it into a useful structure. Well, since I hadn't planned this far along I was now significantly behind the fiberglass power curve - with no precut fabric - or even an opened package of glass fabric and an expiring pot life of mix. But I managed , probably, we will see tomorrow :) I didn't exactly follow Greg's instructions, and therefore it took much more time, but I am also testing the 1st theory of fiberglass - “You can always fix it”.
|
|
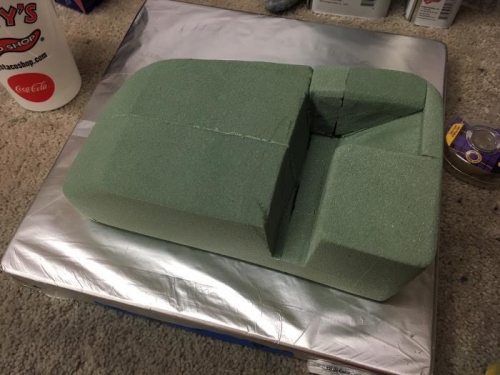
final shaped foam pattern - right fuel tube trough visible
|
|
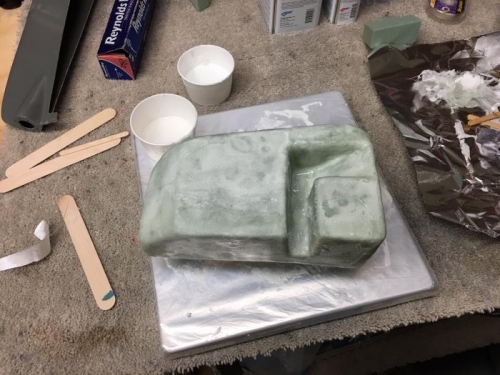
slurried / lay up mess...
|
|
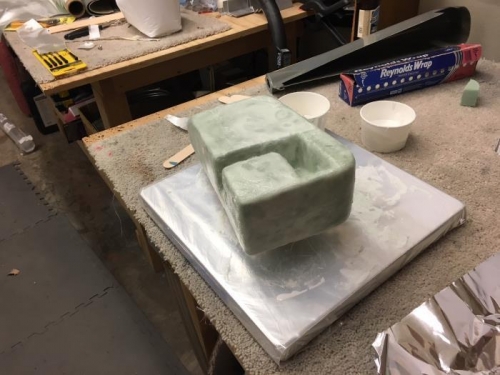
one layer on...and a steep learning curve mounted
|
|
|
|
|
|
|
|
|
Copyright © 2001-2024 Matronics. All Rights Reserved.
|