Our schedules were sync’d up again and Bob was back in the shop helping. The baggage door was still strapped in position but by now, the pro-seal has dried and it was time to un-strap it and see what she looks like. Finally, as expected, that baggage door is flush on the perimeter as it is supposed to be. I am happy!
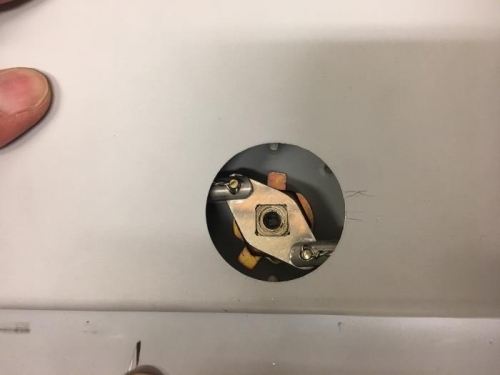
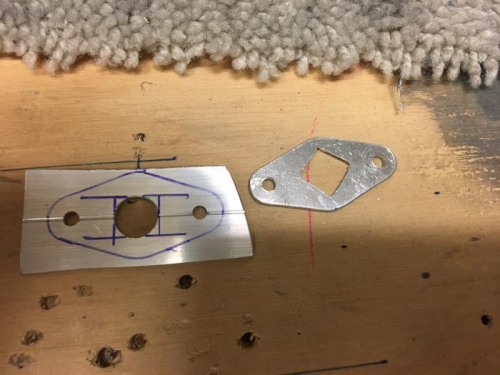
The next step is to install the locking mechanism into the baggage door and attach the locking rods via clevis pins and safety wire. We were able to complete that task – which wasn’t easy with the limited space and the 4 needed hands – but we did it. I am not sure if I bought a non-standard lock (which came with my starter switch) but the aluminum lock arm sits on the lock post at a 45* angle instead of 180* flat – so moving from locked to unlocked only moves the latch pins partially out to partially out. If they were oriented straight out (180*) then when you unlocked the lock – the lock arm would move from 180* to 90* and the latch pins would move from fully extended to fully retracted… I cannot change the lock so I will have to cut fabricate another 1/16” thick lock arm that is oriented at the 180*, not the 45*. Bob and I worked thru the best way to fabricate one from an old Z-bracket and we began the process until we ran out of shop time. Thanks again for all the help, Bob!