
|

|
|
|
Jims RV-8
|
Date: 11-16-2014
|
Number of Hours: 5.00
|
Manual Reference: 8-62
|
Brief Description: Rudder pedals – Finish
|
|
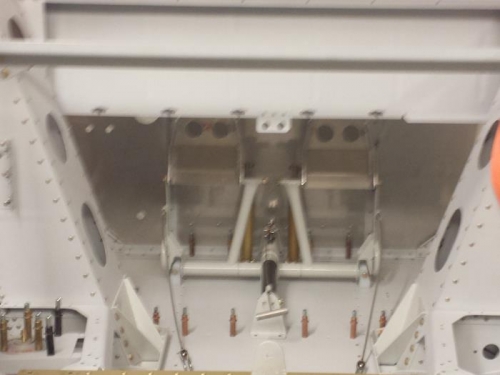
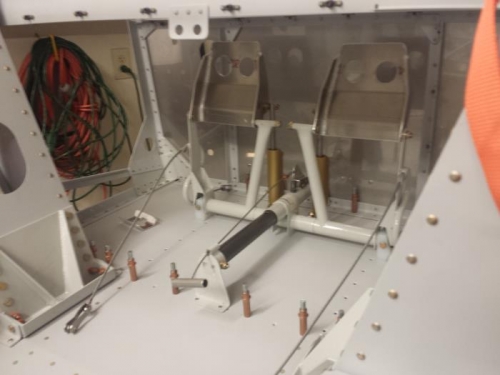
I finished up the rudder pedal work and just need to go back and cotter pin all the castle nuts. So, after the shaving of the master cylinder attach lugs, I mounted the bottoms of the brake master cylinders to the Rudder slide (WD-816). I also marked the master cylinder bolt location on the rudder pedals (WD-820) but I marked them at 7/16” up instead of 5/16” which will move the top of the rudder pedal forward about ½”. This was suggested in the plans for people with “bigger” feet – as it moves the brake activation forward just a bit, which aides in over-applying the brakes.
I did not clamp and drill the pedals separately as notated in the plans so if my rudder pedals are “off”, I might need to purchase a new pedal and re-drill it after lining up the drilled pedal and clamping everything in alignment. My mistake there, but from what I can tell, the pedals are very close to aligned.
After drilling the holes, I attached the top of the master cylinders to the pedals and tested for smoothness and to make sure the brake master cylinders returned to their starting position after being released. I also fashioned the lock pin and made the lifter mechanism. The look pin took a long time to get the roll pin pressed all the way thru and back out ½ way – that was a pain. I used wood with holes drilled to hold the pin, and hammered with everything from a hammer to the tungsten bucking bar… it took a while but the results were good.
I cut the fairlead both length-wise and a slot and used a C-clamp to press it into position, then it was just a matter of drilling a hole in one side of the handle, installing the release assembly on the slider tube, moving the rudder pedal to the forward-most position and then running the cable thru the handle, making a knot where I wanted the cable length to be, cutting off the excess cable and pulling the knot up into the handle to tighten it.
|
|
|
|
|
|
|
|
|
|
|
|
|
Copyright © 2001-2024 Matronics. All Rights Reserved.
|