Brief Description: F-01203A-1 Assembly and F-1204C-L&R Install
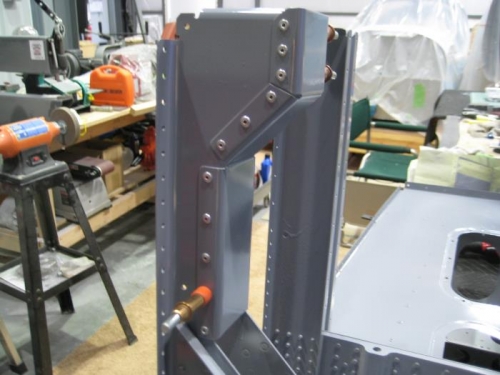
Completed steps 2-6 page 21iS/U-12. Step 2: Riveted F-1204CL-L to the Left Seat Floor Assembly using the rivets called out in Figure1. Riveted F-1204CL-R to the Right Seat Floor Assembly using the rivets called out in Figure1. Step 3: Riveted F-1204H to the forward side of F-01204B-L-1 and forward side of F-1204CL-L using the rivets called out in Figure 2. Step 4: Slid the called out bushing intoF-1204M then installed them between the F-01204B-L-1 and F-1204CL-L using the hardware called out in Figure 2. (The bolt is secured with the nutplate already attached to the aft side of F-01204A-1.) Step 5: Riveted the remaining F-1204H to the forward side of both F-01204B-R-1 and F-1204CL-R using the called out rivets. Step 6: Slid the called out bushing into the F-1204M, then installed them between F-01204B-R-1 and F-1204CL-R per the hardware call-out.
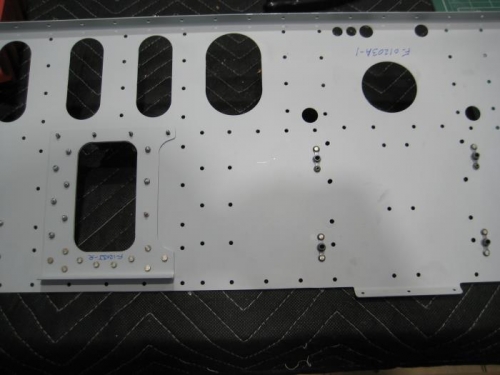
Completed steps 1-3 page 21iS/U-15. Step 1: Separated F-1203J by removing the hatched areas shown in Figure 1. Step 2: Riveted the four nutplates shown in Figure 2 to F-01203A-1 using the rivets called out. Step 3: Riveted F-1203J-L & -R to F-01203A-1 using the rivets called out in Figure 3.