
|

|
|
|
Keiths Web Site
|
Date: 2-9-2010
|
Number of Hours: 6.50
|
Manual Reference: P 37-02, Steps 5,8
|
Brief Description: Start tank assembly
|
|
I managed to get my biennial flight checkout completed yesterday, so I'm set to fly for another couple of years. All I need is a plane...
I cleaned up the paint runs from last weeks' epoxy priming and set to with grey top coat. The paint went on better today after reducing the airflow, and diluting the paint with a little more water. Or maybe the paint gods were just being more amenable today.
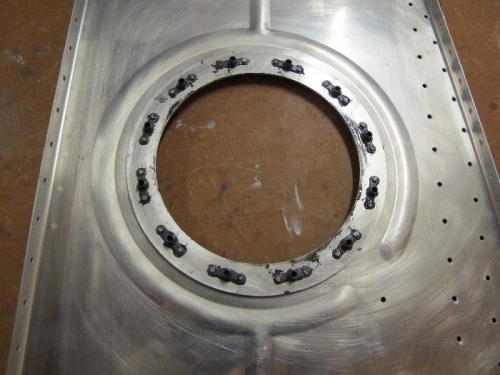
After lunch I got started with the "goop". I measured 2 grams of hardener (on a gram scale that I had bought on the internet for a tenner), and 20 grams of black sealant. Boy this stuff is tough to mix properly. I ground down a lollypop stick so that one end was flat with a sharp end and used this as scraper. First job was to install nutplates to the access Ring and the Forward Bulkhead. Each of the rivets needs to be swirled in the goop prior to insertion, and mating metal surfaces also need a layer of the stuff. Even with gloves on, the mess soon started to spread. Picture 1 shows my nice painted surface starting to get messed up. Picture 2 shows the other side, which is messier yet, but no-one will see this ;-)
Picture 3 shows the Forward Bulkhead riveted to the Main Tank Skin. Lots of stuff everywhere by now. I elected not to clean up the goop around the rivet heads - but chaned my mind later. I could not use MEK to clean up as this would remove the paint, which takes a week to cure. Big mistake painting the tank parts before assembly...
|
|

Nutplates gooped in
|
|
T'other side
|
|

Tank bottom
|
|
|
|
|
|
|
|
|
Copyright © 2001-2024 Matronics. All Rights Reserved.
|