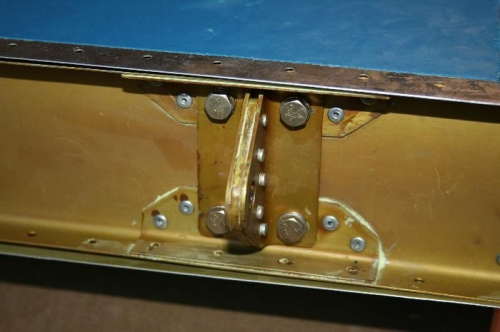
To do this I temporarily fitted the upper hinge assembly, which can be bolted to the VS spar - see picture.
The lower hinge assembly can be installed by pushing the bolts through, but there's no nuts to retain them. This allows the rudder spar to be offered up to the VS spar. The top and bottom (rudder horn) hinge brackets fit around the assemblies on the VS spar. Top and bottom hinge bolts are slotted through with washers between each component. It's a fiddle getting all of the washers in place but I confirmed that the default number and size of washers is just right for the job. I can now take it all to bits again so that I can assemble the rudder in the knowledge this it should fit correctly onto the VS spar.
Flush from success, I set about assembling the rudder. First job is to rivet the spar caps and the top rudder rib to the rudder spar. Again big domed rivets are the order of the day. I had difficulty finding space to get the squeezer dies in place. After doing the two outside rivets I stopped to see how I had done. Badly! One rivet had a smiley across the machine head, and the other went it crooked.
With no obvious means of securing the assembly in the pillar drill to drill out the rivets I tried, with misgivings, to do it freehand. Result was two enlarged holes in the rib, and slightly enlarged holes in the spar to boot. I'm off to Tim tomorrow for advice. I suspect I will be ordering replacements.