
|

|
|
|
Daniels Web Site
|
Date: 8-22-2016
|
Number of Hours: 2.60
|
Manual Reference: 46-xx
|
Brief Description: Finish Engine Installation
|
|
Pages 46-18 and 46-19
Cut interconnect hose and drain hose, slipped interconnect hose over fuel pump drain fitting, and secured with hose clamp. (steps 1 and 2)
Placed cushioned clamps over pushrod tubes and closed clamps using safety wire. Installed drain hose into position. (steps 3 and 4)
Fabricated drain tube (template on page 46-19) by cutting to length, flaring ends, trimming flare, and bending. (step 5)
Installed drain tube with cushion clamps loosely installed, then secured each end with hose clamps. (step 6)
Attached drain tube cushion clamps to cushion clamps on pushrod tubes and secured with screw and nut. Secured drain hose with tie-wraps, then trimmed lower end. (steps 7 through 9)
PAGE 46-18 AND 46-19 ARE COMPLETE
Page 46-20
Removed banjo bolt, hose nipple, and gaskets (reused one on straight fitting) from bottom of engine. Applied Loctite 242 to threads of straight adapter, reused one of the gaskets, installed, and torqued to 17 foot-pounds. (steps 1 and 2)
PAGE 46-20 IS COMPLETE
Page 46-22
Inserted spade connectors from regulator cable into connector housing locations G and G. Finalized routing and tie-wrapped regulator cable forward of firewall. (step 3)
Inserted spade connectors from WH-00062 cable into connector housing locations R and B. (step 4)
Inserted spade connector from WH-P761 (small yellow wire) into connector housing location C. (step 5)
Inserted connector housing into rectifier regulator. (step 6) Cleaned up wiring under panel with tie-wraps.
PAGE 46-22 IS COMPLETE
|
|

Drain Tube Installed
|
|
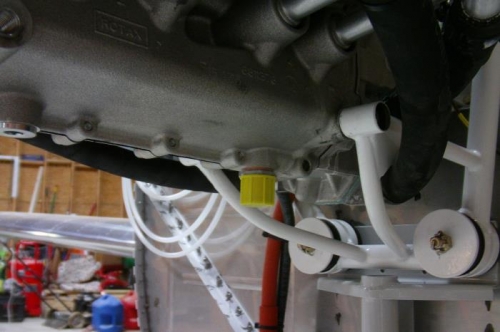
Straight Adapter Installed
|
|
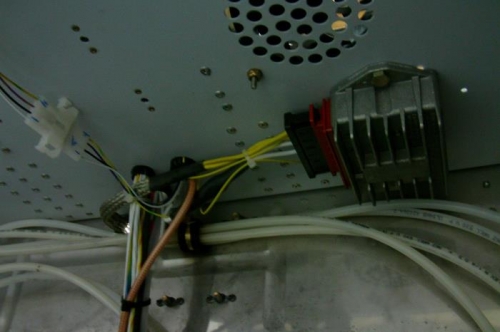
Rectifier Regulator Final Install
|
|
|
|
|
|
|
|
|
Copyright © 2001-2024 Matronics. All Rights Reserved.
|