
|

|
|
|
Andrews Web Site
|
Date: 6-16-2020
|
Number of Hours: 4.00
|
Manual Reference:
|
Brief Description: First Bottom (aft) Fittings Drilled
|
|
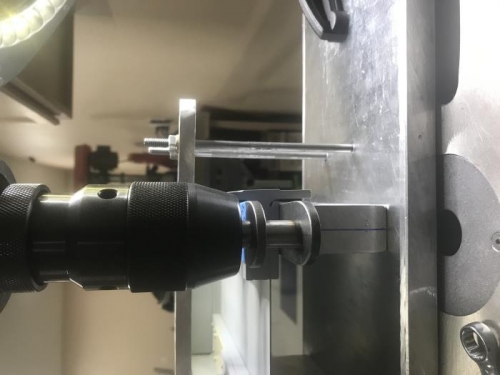
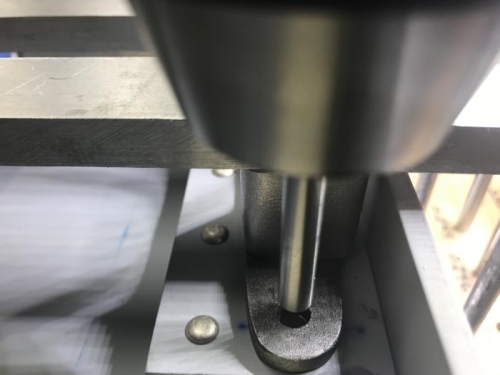
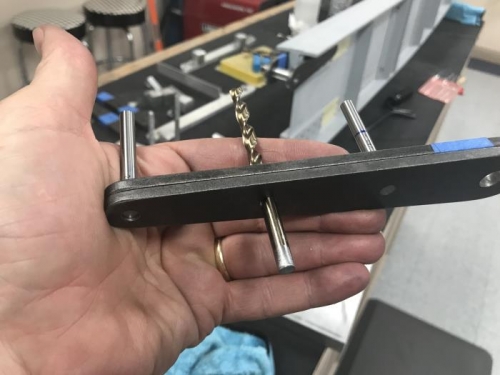
The following is the process I used to drill the bottom fittings. First, I drew a centerline on the fitting so I could see that the most inboard hole was centered over the lower fitting. Next I clamped the fitting in place once I checked the alignment of the main attach hole using the drill press as truth for perpendicularity (see image 1) and the alignment of the inboard hole over the centerline. Next I used a 0.246 check pin to align the drill press over the hole I want to drill (a drill bit with flutes is too sloppy for setting this up). Next I inserted a C size drill bit and made sure that the bit could be lowered into the hole until it hit the fitting without drag on the hole. Once in contact with the fitting, the depth on the drill press was set. Next, using Boelube Blue lubricant, I drilled the hole through the lower fitting at 200 rpm. Finally, I used a D size drill to drill through the whole stack. (Bringing everything up to final size). When I had the three key holes drilled, I pulled the fittings out of the fixture to see how things were going. Surprisingly, a D size drill bit fits well through the top and bottom fitting. This means, that the drill bit did not wander appreciably in the stack and I may have been able to use the Mustang Aero pre-drilled fitting without making the holes oblong to fit. ....but before we say My OCD made me waste time and money using the undrilled fittings, I will say that the second fitting did not come out perfectly. It is likely only a few thousandths out, but, it would have made an oblong hole during the ream. Also, it is easy to think that things fit well and tightly in a big stack of metals when some of the fits could be loose.
|
|
|
|
|
|
|
|
|
|
|
|
|
|
|
Copyright © 2001-2024 Matronics. All Rights Reserved.
|