Brief Description: Lots of small stuff that you cannot see
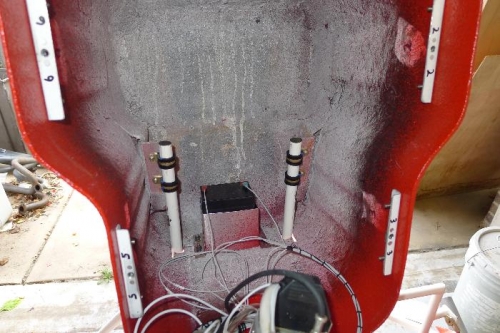
Worked all day and did nothing that the casual observer would notice. Photo 1 shows the inside of the instrument pod. What you see are the two cut off support tubes poking through the bottom of the pod. There is an aluminum angle fiberglassed to the sides. The adel clamps are screwed to these angle brackets. Between these and the pedestal it appears to be a very solid setup. We will see.
I spent way to much time trying to get the angles right on the mixture cable and lever. In the end I decided that it was not possible to have is geometrically perfect so you can see what I wound up with. I bought both -4 and -3 plain clamps. My mixture cable measures at 0.25" but the -4 clamps would not hold it tightly enough. I wound up using just the -3 clamps on all the cables.
I got the carb heat box hooked up also but I did not figure it was worth spending the electrons for a picture. I started on cleaning up of the wiring under the seat. Since I am still waiting on my Power Flow exhaust, I do not that the EGT thermocouple wires in place. I cannot finalize the cleanup until I get them all in. Also found out from the MGL Avionics people that I had the CHT thermocouples hooked up to the wrong spot. Had to redo them.