
|

|
|
|
Dex RV7A Build
|
Date: 1-2-2008
|
Number of Hours: 4.00
|
Manual Reference: 6-5
|
Brief Description: VS Finishing 1.
|
|
Finished off the rear spar, Precoted and primed it. I'd ordered the Van's touch-up paint with the kit, its a perfect match for the powder coated parts and covers the rivets nicely too, highly recommended. Pic 1. I have to say, the assembled rear spar is a lovely looking piece of engineering and a joy to put together. Made a small mistake in that I didn't increase the pressure from when I was priming, so got a slow squeeze on the squeezer whih clenched a couple of rivets, easily drilled out as access is no problem of course. Good learning point though.
Assembled the front spar, had to use an offset rivet set for the VS-705/VS-704/VS-702 intersect. Primed the skin and front spar rivets and then clecoed on the skin. Pic 2.
Rivetting the VS is a breeze, just watch out for 3-4 rivets in a couple of places, easy to forget when you get into the swing of things!!!! don't ask me how i know that!!!
Once the skin was rivetted, the new rivets and bucking bar marks were primed as shown in pic 3. I've got into the habit of pouring any excess from the spray gun into a paper cup ready for this task.
One last point, the pneumatic Cleco tool can into its own again, took well under 10 minutes to Cleco the whole VS.
|
|
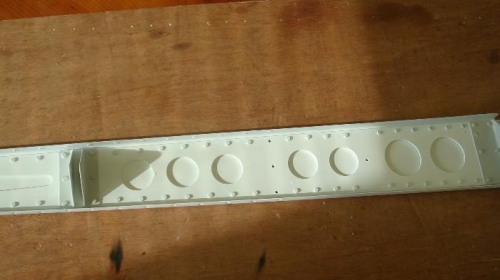
Rear Spar Finished and Primed.
|
|
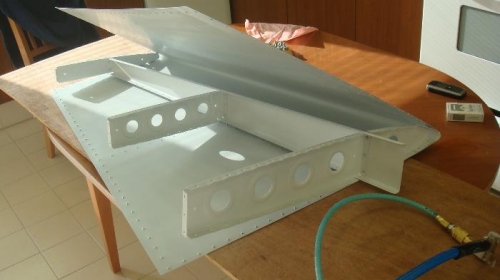
Prep for Final Assembly.
|
|
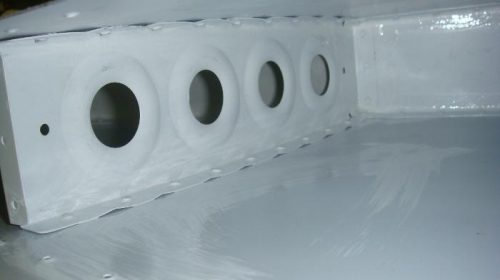
Internal Rivet Priming.
|
|
|
|
|
|
|
|
|
Copyright © 2001-2024 Matronics. All Rights Reserved.
|