Today started with leveling the seat back to a good gap allowing a top tray later. This took a while with sanding sticks and the vibration cutter although not in that order.
After another think, I decided that a removable tray below the rollover, while more work, would allow me to easily lay wires across the plane up at the top of the longerons. Nothing like extra provisions eh? I might even fit some electronic box in there although its pretty tight.
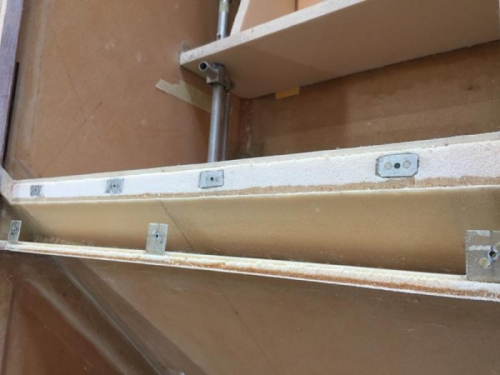
This meant nutplates had to be installed and I had a bunch left over from the first few failures of the noselift sock. Four of them went in the seatback. I also had some glass angles I'd made for something else and never used. They went in the front section as you see in pic 1. The rest into the foam seat back. I glued these in with 5mt and flox.
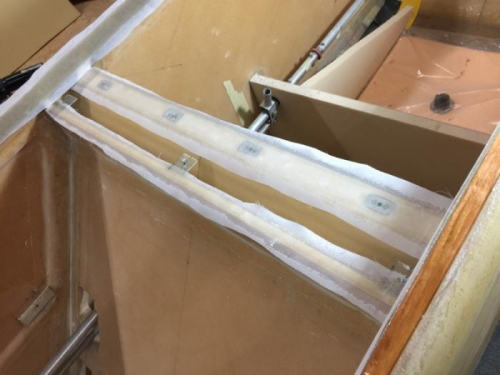
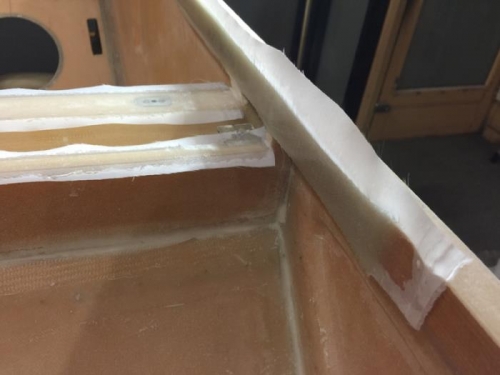
Then a lot of glass was cut on foil. I also did the seat top foam with a ply of BID which is not pictured, you'll see that in the next log. The rollover has a couple of mill to fill up at the sides which is perfect for reinforcing the longerons locally. I did 12 plys of BID per side as you might see in pic 3. Some of that will get sanded off but not much. I want a nice close fit for this rollover before I start drilling holes and adding bolts. The seatback got healthy flox corners of course and one ply of BID and some peel ply just in case I have to add any micro to get a flat top for the shelf. We will see tomorrow how it all worked out after a cure.