
|

|
|
|
Building Juliette Whiskey
|
Date: 8-26-2006
|
Number of Hours: 6.00
|
Manual Reference: Section 6
|
Brief Description: Pro-Seal
|
|
This morning I got started around 8:00 a.m. The first thing was to bend the ends on the new trim tab skin I got in the mail yesterday. I clamped the left side and did the bends with no problem, just like before. When I clamped the right side, I was a bit more careful, because I didn't want to kink the skin again. The reason the blocks kinked the skin last time was because the right side of the trim tab is angled. The blocks have to also be clamped at an angle and that caused the edge of the block to dig in the skin and kink it. I had a hell of a time getting this bend done, but I finally prevailed! I next scuffed and cleaned all the parts to be pro-sealed. I have to do the right & left elevator trailing edge, the rudder trailing edge, and the trim tab foam ribs. After preping all the parts I got my supply of paper towels, M.E.K., popsycle sticks and disposable gloves. I found a caulk gun in the basement with a small diameter plunger for the pro-seal tube. I next mixed the proseal (it mixes right in the tube)....so far, no mess. I then started to apply it on the AEX wedge for the elevators. This stuff is gooey and I spead it on with the sticks. I then worked the wedge between the skins and clecoed....what a mess!!! I did the others and then the trim tab foam ribs. The pro-seal was on every table and some on the floor. I took a break.......After the break, I got a roll of paper towels and some M.E.K. and cleaned all the parts, tables, and benches. The M.E.K. totally cleans the pro-seal. After an hour of clean-up, I match drilled the trim tab skin, spar and hinge, then riveted the parts together. I will let the pro-seal set for two days then rivet the trailing edges.
|
|
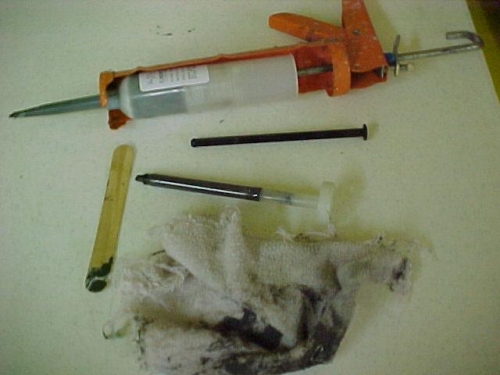
Pro-seal......it's a dirty job, but someone has to do it!
|
|
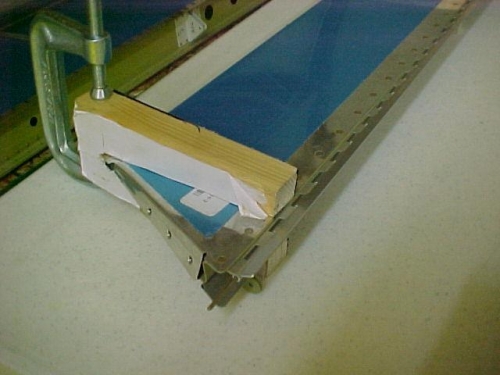
Trim tab foam ribs inserted and clamped with homemade wood clamp
|
|
|
|
|
|
|
|
|
Copyright © 2001-2024 Matronics. All Rights Reserved.
|