Brief Description: Door Handle Assembly with Rack Handles
SECTION 45-13
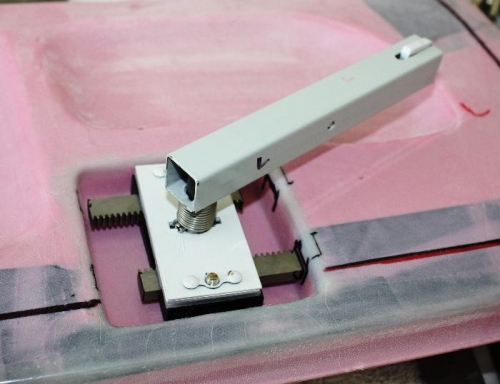
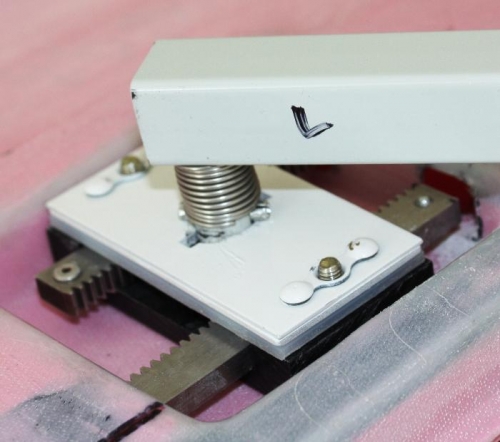
Step 1, Found the VA-197 Spring and C-1007 Handle Slide to the WD-1022 Door Handle Assembly with a roll pin as shown in figure 1. Step 2, Secure the C-1008 Handle Lever to the WD-1022 Door handle Assembly with a screw as shown in Figure 2. Slide the C-1006D Handle Face Plate and C-1006A Handle Plate assembly and the Handle Pivot onto the door handle as shown in figure 2. Attach the C-1014 Handle Spur Gear to the door handle assembly using the roll pin as shown in figure 2. Step 3, Find the two Handle Rack Trimming that are shorter than the Handle Racks that will be used as the final product and place into the Handle Latch Mechanism Assembly. Step 4, Attach the Latch Mechanism into the C-1002 L/R Door latch pocket. Now I operated the Latch Mechanism to extend the two Handle Rack Trimming into the side wall in the pocket and marked where they meet with a permanent marker pin. Remove the Latch Mechanism and drill a pilot hole and then a 1 / 2 inch hole into the area I just marked. Test fit the Latch Mechanism with the Rack Trimming so that enough clearance is obtained. Step 5, repeat the above steps for the Left Door.