
|

|
|
|
Serenity
|
Date: 5-17-2008
|
Number of Hours: 3.50
|
Manual Reference:
|
Brief Description: Drilled and riveted aft deck
|
|
Fit, drilled, deburred, primed, and riveted the aft deck. This deck is important to lock out any twist in the fuselage. So, one needs to prop the fuse on stands, level it side to side measured at the mid fuselage, front to back also at mid fuselage, then at the tail. The tail was o.2 degrees off on the SmartLevel, more than good enough. But hey, let's be anal and bend out the twist. Once done, I clamped the aft deck and made sure the level stayed at zero, then drilled and clecoed to the underlying longerons. I also fabricated some spacers on the cross bars seen in pic 2 - not mentioned in the instructions but gleened off of other builder's sites and noticed on the plans. I didn't have the AS3 .125 plate stock for the longer spacer, so made it from a sandwich of two .063's. I held them in place with tape (seen in pic 2) so they wouldn't slide around, replaced the aft deck, then drilled the spacer holes. Everything was then deburred, primed, riveted (squeezer for all except on erivet per side had to be done with the gun). Twist is now locked out for the fuselage!
|
|
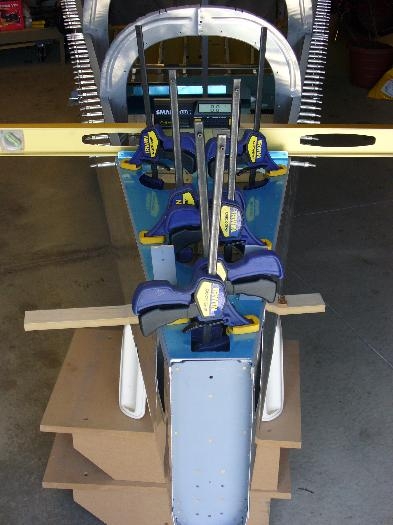
Aft deck clamped after leveled for twist.
|
|
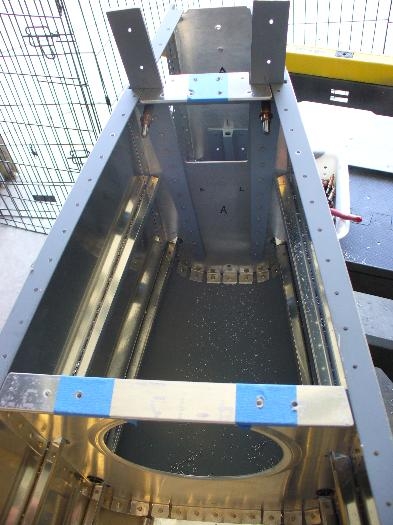
Spacer bars taped in place for drilling.
|
|
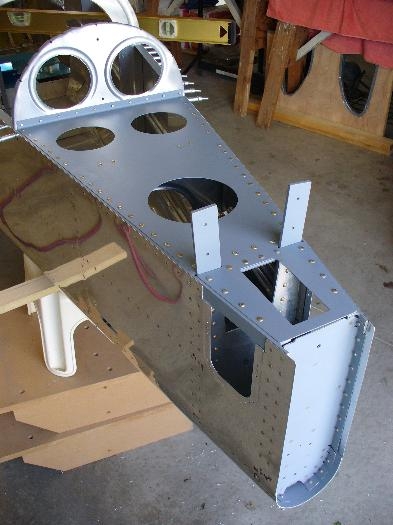
Done riveted.
|
|
|
|
|
|
|
|
|
Copyright © 2001-2024 Matronics. All Rights Reserved.
|