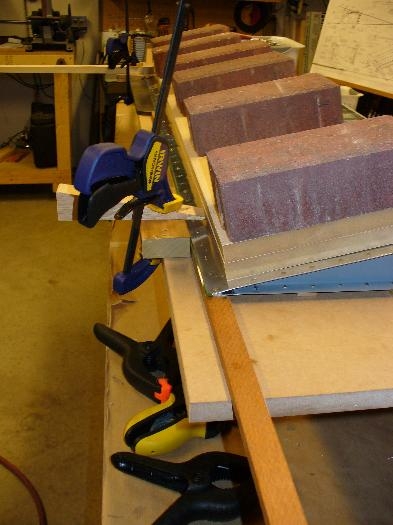
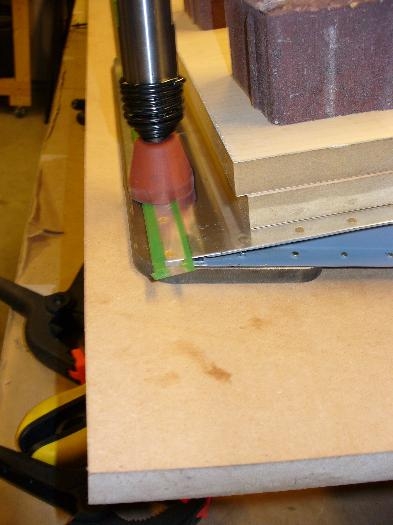
Finished riveting. I was nervous about the wavy trailing edge, but other builders all indicated this same problem and had straight TE's anyway when riveted. So, as with the elevators and rudder, rivets are placed in all the holes, then tape applied. I followed Mike Schipper's advice and clamped the trailing edge before flipping over to start back riveting. ALl the boards and bricks were placed to weight down the aileron and hold it dead flat. The first pic shows some tips - weights applied, and the backrivet plate is underneath the TE. Since it is only 12 inches long, I planed some wood strips to the same thickness to cover the reat of the trailing edge and for the front of the aileron, so the whole assembly was help off the table a uniform thickness. As I riveted down the TE, I slid the steel plate and wooded sticks along. Pic 2 shows backriveting, then the aileron was flipped over and the mushroom set was used to finish the head. Final result - DEAD straight.