
|

|
|
|
Serenity
|
Date: 11-1-2006
|
Number of Hours: 1.50
|
Manual Reference:
|
Brief Description: R elevator trailing edge
|
|
Started the trailing edge. Clamped the skins and wedge piece on some angle on a board. I made an 84 degree jig from some wood scrap to guide the drill (the wood works well - stands by itself, and if jointed, will be accurate in two axis). Van's calls for drawing a line 1/4inch or so from the front of the wedge, then sighting the line down the holes on the upper skin and clamping. Other builders have complained that there is a fair amount of wedge sticking out between the skins, so i just sighted the trailing edge of the wedge 1/16th inch protruding, clamped, and started drilling. I would recommend folowing Van's advice, and then filing the protruding wedge later. I found that my method left a bit thinner part of the wedge between the skin holes, so when I countersunk, the cut into the countersink on the opposite side. It should still work out fine, but I should have followed the instructions closer. Regardless, I took everything apart after drilling to #40, deburred the skins, dimpled, then countersunk the wedge as mentioned. I re-clecoed - looks OK. I will stop here and bond the trailing edge later with fuel tank sealant (FTS). I have a 1 oz jar, but it doesn't appear enough to bind the edge and add a dab where the stiffners end and touch the opposite skin (possible source of skin cracking here). I ordered the 3.5 oz cartridge from Van's, as it was easy to use with their gun that I bought. I will start on the left elevator next, and do the FTS all at once when ready.
|
|
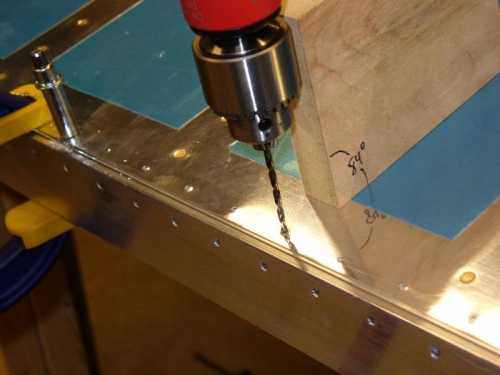
drill through skin/wedge/skin/angle
|
|
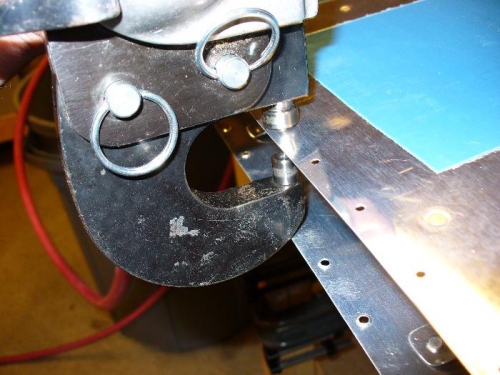
dimpling
|
|
|
|
|
|
|
|
|
Copyright © 2001-2024 Matronics. All Rights Reserved.
|