Brief Description: Install Inboard Rib with Sealant
Dry assembled all the components for the inboard rib. Used the template from right tank to bend the float wire for the left tank. Tetsed float swing and adjusted the bends in the wire to get good clearance on tank stiffener and flapper door. Checked resistance of fuel sender with digital multimeter, and had readings in the proper range for full and empty positions. Dis assembled all, edge finished and prepped spacers for vent line and fuel pick up. Cleaned all mating surfaces with MEK.
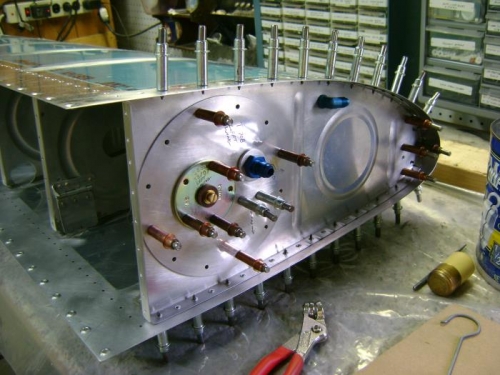
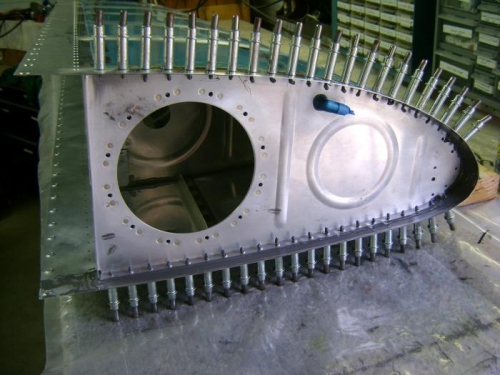
Mounted rib in the vice and mixed 60 grams of sealant. Installed vent fitting with sealant under shoulder, on mating surface of rib and spacer, then installed nut and torqued to 85 inch pounds. Made fillets around spacer and nut with popsicle stick.
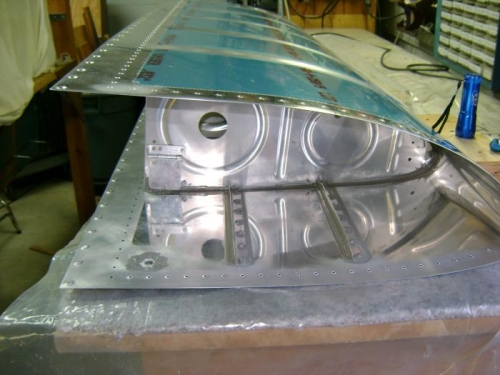
Buttered mating surface on skin with plastic picnic knife, then buttered flange of rib. Inserted rib and used pick to align rib with rivet holes on top of tank. Inserted clecos across the top. Flipped tank over and again used the pick to align holes and insert clecos. Used popsicle stick to smooth out fillets around rib and remove excess sealant. Put a piece of tape across trailing edge to pull skin tight to back edge of ribs.