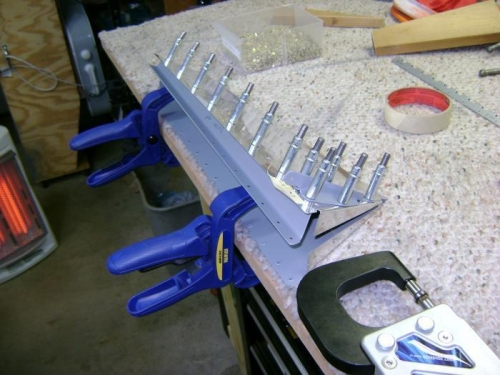
On Thursday, 20 Mar, I primed the trim tab skin, spar and control horns with NAPA 7220 primer.
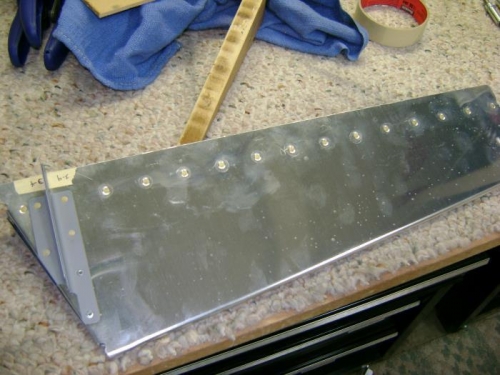
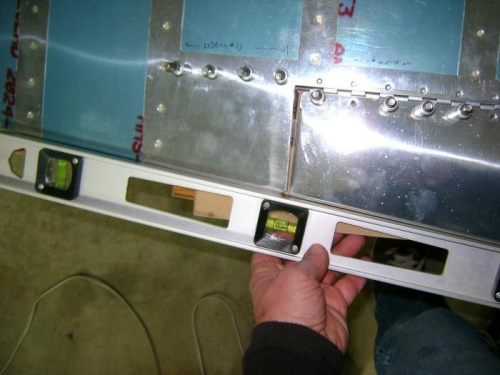
On 23 Mar I reassembled the trim tab and then removed the cleco's from the top of the spar flange. This allowed access to squeeze the rivets in the bottom of the spar. The new flange yoke from Cleaveland worked well here and I was able to squeeze all but the two aft rivets on the control horn. I drilled to #33 and used MK-319-BS pulled rivets for these two holes. After reviewing the VAF website for techniques on mounting the hinge, I drew a centerline on the forward hinge, cleco'd the hinge on the trim tab and aligned per the plans. I used a cleco clamp on the inboard edge and shimmed up the trim tab to hold everything in position. Centerlines showed through the holes with the aft and inboard edges aligned with a 48 inch level (not the one in the picture). My fold in the elevator skin is not exactly perpendicular to the cut out, so I ended up with a 3/32" gap (minimum per plans) at the trailing edge which gradually widens to 3/16" at the forward end. I marked the outboard hole on the forward hinge then removed the forward hinge and drilled that hole to #40 on the drill press. Reassembled with a cleco in the hole and clamp inboard. Re-checked alignment then drilled all holes from outboard to inboard, inserting a cleco in every hole. Marked the skin line on the forward hinge, removed it and trimmed to match the skin. Finished off by rounding the corners of both ends of the hinge on the scotchbrite wheel.