Brief Description: Install Trim Motor, Bend Elevator Tabs
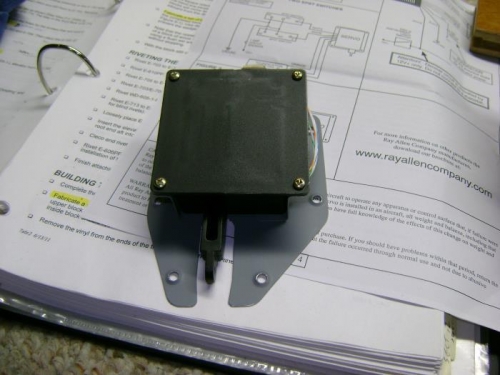
I drilled, deburred, scuffed and primed the parts to mount the trim motor during the week. Today I riveted the brackets to the inspection plate and mounted the motor with four screws and self locking nuts. Put a dab of torque seal on each nut. The nut plates on the elevator prevented the motor from going into the hole. I filed off the edges of the two most forward platenuts almost even with the opening in the elevator. This allowed just enough room to maneuver the motor into place.
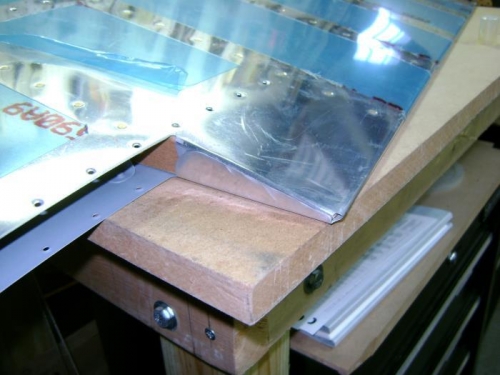
Afternoon work was preparing to bend the tabs on the elevator at the trim tab cut out. I measured the angle of the elevator as 12 degrees and cut a bending block from a piece of hard wood. Filed the cut line smoth and radiused the edges where the aluminum will bend. Used two-sided carpet tape to secure the block to the elevator and clamped it to the edge of the bench. Proceeded as described in the plans, using a hammer and wood block to initiate the bends. Got the bottom tab close with this method then switched to the rivet gun. I used a mushroom set at 20 psi. I over did the rivet gun a bit, even with only 20 psi it does not take many hits to bend aluminum, and I moved the block behind the tab. Was able to rermove the blocks and tap the tab back into position. Reinstalled the blocks with new tape and proceeded to bend the top tab per the plans. Very judicious use of the rivet gun produced a satisfactory result. The bends are very nearly straight (slight bow in the middle) and perpendicular to the trailing edge of the trim tab cut out.