Brief Description: Mounting the Experimental Air Panel
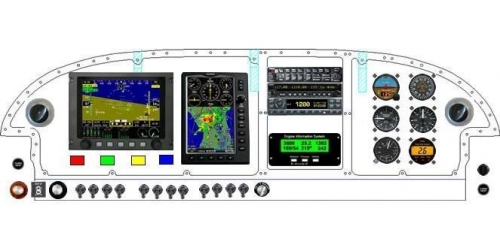
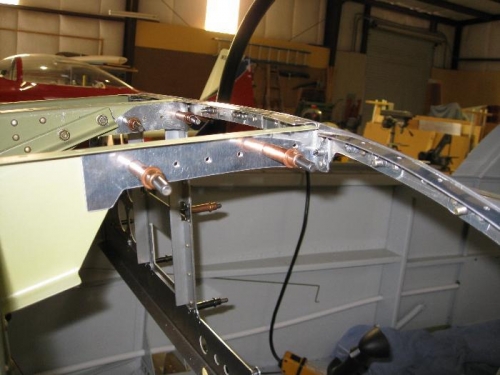
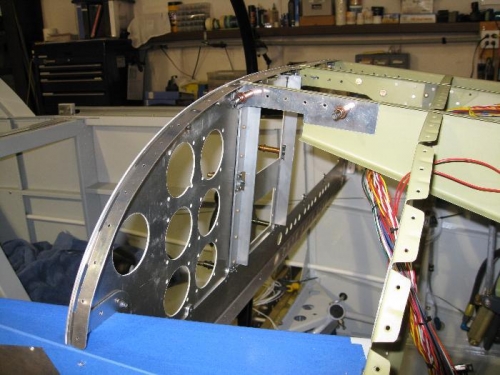
For those of you who have followed this build you know I had installed the Laird Owens panel. I was very happy with the looks and the set up, but then the new Garmin 696 was announced and it caught me flat footed. I had expected another 496 sized unit and that was just not the case. I could have stayed with the 496, but after reviewing the capabilities of the 696 and the safety features it offers, I made a decision the change the panel to incorporate it since there was no way to get it in the Owens panel. I was lucky enough to sell the panel to a RV 9 VFR builder and went about the task of a re-designing the new panel with more real-estate. Although nothing will look as good as the curvy Owens panel, it is impractical for a glass panel plane and the room they require. I had Nick at Experimental Air cut a panel design that will work for me. The panel is 12 ¾” and has the radio stack offset to the right of the center. I live in South Carolina and it is hot here, so I like the high air vents, and I also wanted to use the new 8 ¾” Grand Rapids unit. This design is also will allow me to ad a 430 someday if the economy ever get better. As far as the construction goes, this is the 4 piece panel with the sub panel mounted to the plane and the 3 top panels fastened to it. This design is great for maintenance and also for adding new gear. The sub panel mounts pretty much like Vans standard panel and the top panels attach with screws into plate nuts. The pictures tell the story other then the modifications I had to make to convert things back from the LO panel.