
|

|
|
|
My RV-8 Build Log
|
Date: 6-30-2016
|
Number of Hours: 2.00
|
Manual Reference:
|
Brief Description: Alternator Blast Tube and Cowl Fitting
|
|
Drilled a hole in the right front baffle ramp for an alternator blast tube to deliver cool air to the alternator on the hot summary southeast days... For the last several days, we have seen air temps at 99, with heat index at 106 on the ground.
After installing the blast tube, decided it was time to start to make sure I can actually install the lower cowl with the air inlet air seal material installed on the lower cowl.
My first try I realized I had failed to trim the top portion of the air seal aluminum strip enough to allow for the baffle in common to seat nicely. Trimmed the left and right baffle back to a point in parallel with the forward ramps on both sides, up to the point where the nutplate will clear the baffle. Since the baffle was installed, I used snips for the rough cut, then the Dremel for sanding the edges then a file to make it nice and clean.
Afterwards I was able to install the lower cowl, by bringing the cowl up to the bottom of the baffle and then pulling up the air seal material between the cowl and the forward ramp, first on the left side then the right side. Once the air seal material was on the top side of the ramp, it was just a matter of pushing forward a bit, making sure the air seal for the FAB was on the outside of the ram air intake tube, and the cowl hangs nicely, allowing for the securing of the Camloc to the firewall tabs.
|
|

Alternator Air Blast Tube
|
|
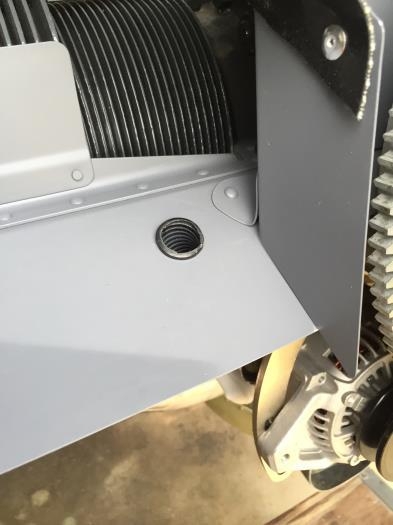
Alternator Blast Tube Entry
|
|
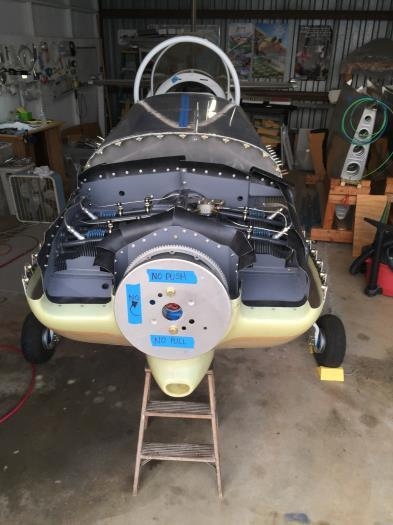
Lower Cowl in Place
|
|
|
|
|
|
|
|
|
Copyright © 2001-2024 Matronics. All Rights Reserved.
|