
|

|
|
|
My RV-8 Build Log
|
Date: 2-16-2014
|
Number of Hours: 1.50
|
Manual Reference:
|
Brief Description: Engine Install - Part 2
|
|
After yesterday's trial and error process of engine installation, did some googling and immediately found the 'Illustrated Guide to Engine Installation' article on the Vans Airforce site. This document clarified everything and is a step-by-step illustrated process which works as documented.
• Identified the proper orientation of the upper and lower engine isolators (Lord) so that the upper mounts have the compression isolator between the mount and firewall, and the lower isolators have the compression isolator between the engine mount and engine.
• Identified the 2 top mount bolts (short) and the 2 bottom mount bolts (longer by the width of the additional washers provided by Vans. These are to accommodate engine sag after some time passes.
• Installed the top isolators on the engine mount.
• Aligned the engine to the mount, and aligned the #1 position (this is the top right as the pilot sits in the airframe).
• Inserted the #1 bolt through the washer, and through the compression isolator, engine mount, isolator, then through the engine.
• Installed the washer and castle nut on the #1 bolt, and tightened all the way to snug the engine to the isolator. This is REQUIRED to get the engine in position for the #2 bolt (top left).
• Aligned the #2 isolator to the engine, required off-setting the isolator a bit to install the #2 bolt through the washer, and through the isolator, then through the engine.
• Installed the washer and castle nut on the #2 bolt, and tightened all the way to snug the engine to the isolator. This is REQUIRED to get the engine in position for the #3 bolt (bottom right).
• Loosened a bit the #1 and #2 castle nuts in order to install the isolators for the #3 and #4 isolators, installed the isolators which have the reverse orientation of the top isolators, so that the washer provided with the Lord mounts is placed between the compression isolator and the engine.
• Aligned the #3 isolator to the bolt hole in the engine, required using a drift pin to obtain the offset of the isola
|
|
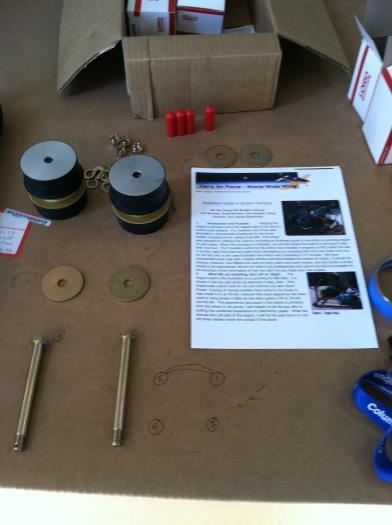
Illustrated Guide to Engine Installation courtesy of Vans Airforce
|
|

Well, that was easy ! - bolt #1 installed
|
|
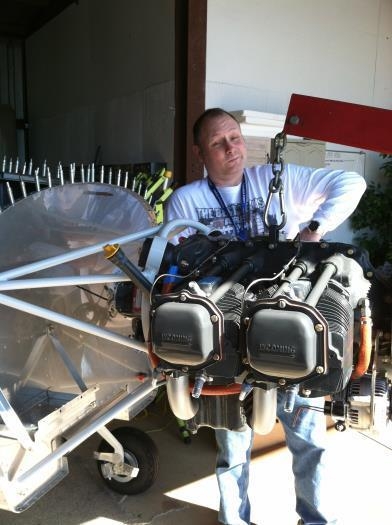
Bolt #1, 2 and 3 install - working on #4
|
|
|
|
|
|
|
|
|
Copyright © 2001-2024 Matronics. All Rights Reserved.
|