
|

|
|
|
My RV-8 Build Log
|
Date: 9-23-2017
|
Number of Hours: 5.00
|
Manual Reference:
|
Brief Description: Intersection Fairings - Attachment Work in Progres
|
|
Removed the right-side intersection fairings and wheel pants from the airframe. Re-assembled the wheel pant, and sanded the wheel pant, then clecoed the fairing. Stood back and pondered the best way to attach the fairing for standard use. One way is to bond the fairing to the wheel pant, in which the fairing must be split. I marked the split line to get an idea about how this would work. I am not convinced I can get the two halves to match up well enough if I cut the fairing into forward and aft halves.
I decided to keep the fairing a separate piece from the wheel pant, which I will attach with #6 screws to platenuts riveted to the inside of the wheel pant. Per Van's, I decided to build up a transition from the wheel pant to the fairing with a 'slurry' mixture of epoxy and cabosil.
I marked the outline of the fairing on the wheel pant, and using a spacer, marked another line outside of the fairing on the wheel pant. I removed the fairing and then applied electrical tape to the area outlined by the two markings. I then liberally applied Nu-Finish paste wax to the entire wheel pant and fairing as a release for the epoxy. After the wax dried, I removed the electrical tape revealing the outline of the two trace lines. Clecoed the fairing in place, then mixed a 'slurry' of epoxy and cabosil, the texture was a light paste, then applied to the wheel pant around the fairing.
Repeated with the left side wheel pant and fairing. The plan is to sand smooth the transition once it's fully cured.
|
|
Ready for some more sanding ...
|
|
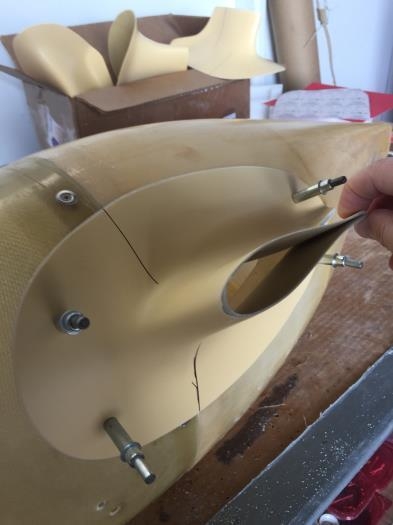
Decided how to attach
|
|
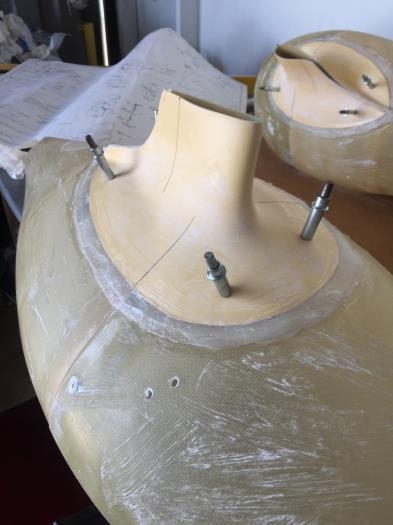
Epoxy and Cabosil mixture in place
|
|
|
|
|
|
|
|
|
Copyright © 2001-2024 Matronics. All Rights Reserved.
|