
|

|
|
|
My RV-8 Build Log
|
Date: 1-8-2017
|
Number of Hours: 0.00
|
Manual Reference:
|
Brief Description: For those who own a 2013+ Ford Escape !
|
|
Ok, this is not directly related to me building the RV-8 - but it sure is a good thing I have been doing so - because I had to replace the 12V battery in my 2014 Ford Escape. This sounds simple, it is not.
1. Open Hood.
2. Look for Battery - it is in the right rear of the engine compartment, hidden by the windshield cowl and a cover.
3. Remove cover - stand back and wonder - go to you tube and google - watch one video where a dude proceeds to cuss at his Escape for 20 minutes. Find another video…
4. Remove the rubber clamps for the FAB intake.
5. Remove the FAB cover, (4) bolts 8mm bolts on top, (1) bolt on the side for the tube directing filtered air to the intake manifold (I assume).
6. Remove the Filter.
7. Remove the FAB bottom. There is a lower tube for the FAB intake that routes under the upper tube, of course the upper is in the way... just go ahead and disassemble the entire FAB, removing all tubes. Finally you can remove the lower FAB.
8. Disconnect the sensor on the filtered air tube to prevent damage.
9. The battery is held in place by a plate on the forward side of the battery box. The plate has a wiring bundle attached at four places. You must remove the plastic attachments of the wiring bundle, three are relatively easy, the inboard lower is a PITA.
10. Lift up, pull forward, and then lower the forward plate on the battery box.
11. Using a 10mm socket, loosen the positive cable on the battery terminal, disconnect the cable, push it aside.
12. Using a 10mm socket, each under the windshield cowl and find the two bolts for the battery hold down, remove these bolts but be careful not to lose them in the abyss, then remove the hold down.
13. The negative cable is tucked behind a tab, reach into the very small area under the windshield cowl and pull it out in front of the tab, otherwise it is impossible to move the battery.
14. Pull the battery forward, as far as it will move, then use the 10mm socket to loosen the negative cable. WARNING - there's is something connected...
|
|
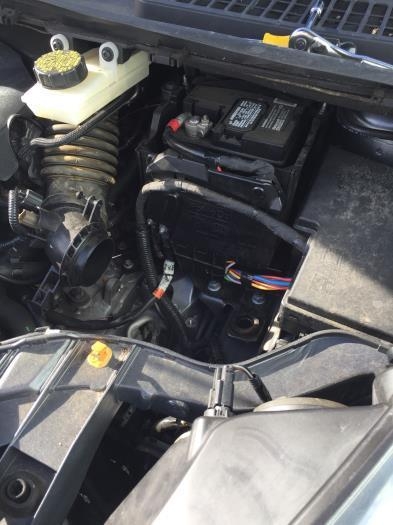
There's a battery back there
|
|
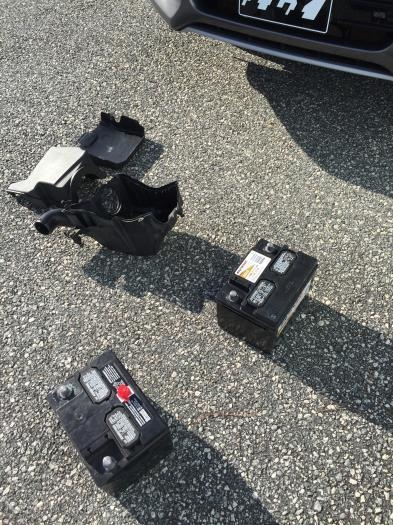
FAB Dissassembled, old and new battery
|
|
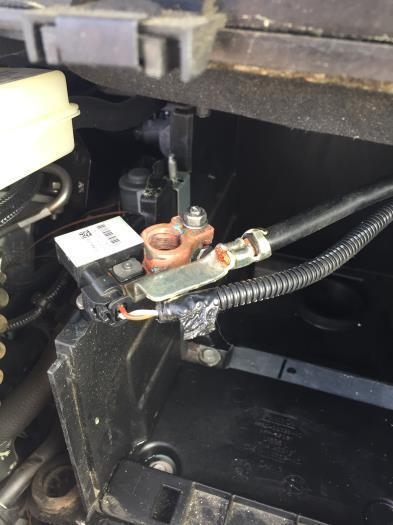
Negative Terminal and something weird
|
|
|
|
|
|
|
|
|
Copyright © 2001-2024 Matronics. All Rights Reserved.
|