
|

|
|
|
Mike and Elisabeth CH750 build
|
Date: 4-18-2012
|
Number of Hours: 9.00
|
Manual Reference: 75-FA-3, Page 4-9
|
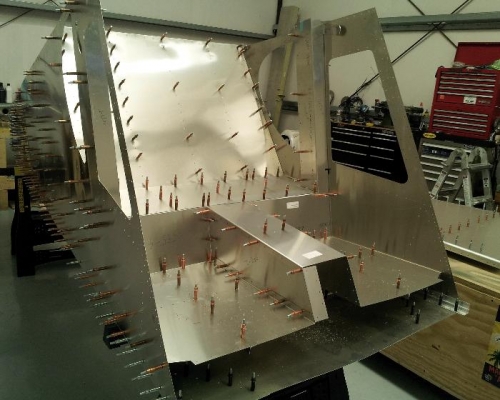
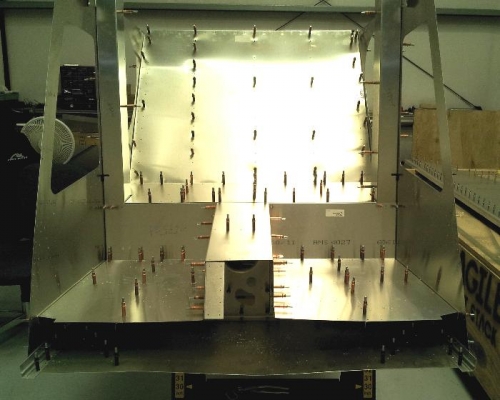
Brief Description: Baggage Compartment
|
|
Cleco the Baggage Floor to the Side Skins and the Baggage Back. With a #30 drill bit, expand the holes through the Baggage Floor into the Baggage Back and the Side Skins and Cleco.
Cleco the Shoulder Harness to the Longeron and Side Skin. With a #30 drill bit, then a #20 drill bit, expand the holes and Cleco.
Cleco the Flaperon Control Covers to the Uprights and Side Skins. With a #30 drill bit, expand the holes and Cleco.
Cleco the Right and Left Baggage Uprights to the Baggage Floor and the Side Skins. With a #40 drill bit, back drill through the two holes on the Baggage Uprights into the Flaperon Control Cover and Cleco. With a #30 drill bit, expand the holes through the Baggage Uprights into the Baggage Floor, Side Skins, and Flaperon Covers.
Cleco the Torque Tube Bearing Channel to the Bottom Skin. With a #20 drill bit, expand the holes through the Torque Tube Bearing Channel into the Bottom Skin and Cleco.
Cleco the Torque Tube Bearing Support to the Torque Tube Bearing Channel. With a #20 drill bit, expand the holes through the Support into the Channel.
Cleco the Right Control Tunnel Side to the Right Baggage Upright. With a #30 drill bit, expand the holes through the Control Tunnel Side into the Baggage Upright and Cleco.
Cleco the Left Control Tunnel Side to the Left Baggage Upright. With a #30 drill bit, expand the holes through the Control Tunnel Side into the Baggage Upright and Cleco.
Cleco the Control Tunnel Top to the Baggage Floor, the Control Tunnel Sides, and the Torque Tube Bearing Support. The rear flange should slide under the Baggage Floor and the side flanges overlap the Control Tunnel Sides. With a #30 drill bit, expand the holes through the Control Tunnel Top into the Baggage Floor, Control Tunnel Sides, and Torque Tube Bearing Support and Cleco.
Cut two L angles 270mm long and two L angles 240mm long. Draw a center line on one flange and mark the first rivet location at 10mm from the end. With a #40 drill bit, predrill the first hole on the mark. Cleco the L angl
|
|
|
|
|
|
|
|
|
|
|
|
|
Copyright © 2001-2024 Matronics. All Rights Reserved.
|