Today I learned yet again to treat Vans diagrams like the US treats nuclear nation-partners: Trust But Verify.
When you fabricate the mounting plate (F-866D) where the brake lines pass through an elbow under the forward baggage compartment, Drawing 34 (Section B-B) shows a spacer on the forward side of the plate, used to take up the slack between the elbow fittings and the mounting plate. It calls out 0.063 stock as the material. Today I made the spacer and tried to install it, but it wasn't nearly thick enough. The elbows spun freely. I ended up making another spacer out of some 0.125 I had, and it worked fine.
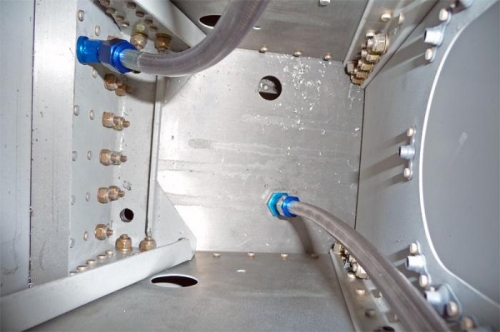
While the paint dried on the new spacer, I tackled another brake-related project. I dilled a pair of 3/4" holes in the bottom of the gear towers where the brake lines will pass through. I had already marked the location for these holes when I mounted the Grove gear legs, so it was just a matter of drilling and carefully enlargening the holes from below. These holes will have grommets in them after I bend and install the brake lines.
Part on the left was made to plans. The one on the right is the proper thickness to do the job.
The hole near the top is where the right brake line will pass through on its way to the gear leg.