
|

|
|
|
Buck's RV-8
|
Date: 6-30-2008
|
Number of Hours: 5.50
|
Manual Reference:
|
Brief Description: Landing gear
|
|
I finished up the installation of the landing gear by ensuring everything was still aligned correctly, then tightening the large, 7/16" bolts/nuts. Next, I drilled the holes for the four outboard bolts, dropping temporary bolts into each one as I went. My friends Bill and Jim helped immensely with this by acting as "human clamps." Next, I drilled the four inboard holes, again installing bolts as I went.
Next, I located and drilled the four holes in the skin that would allow me to drill the ends of the outboard wear-plates. (Vans calls for 1/4" holes here -- enough to allow only a drill bit. I opened them up to 3/4" to allow me to insert a 7/16" deep well socket so I can torque the nuts properly later. This area will be covered by a fairing, so the larger holes are no problem. I drilled the four holes in the ends of the outboard wear plates.
Finally, I crammed myself up under the fuselage and drilled the four 1/4" bolt holes at the ends of the inboard wear plates. These must be drilled from the inside of the fuselage, and since I made the choice to mount the gear while the fuselage was resting upside down on a low cradle, I have no one but myself to blame for how strenuous it was. I barely fit in there, and holding the heavy drill over my head while applying enough force to drill hard steel -- well, let's just say I'm glad that job is over.
|
|
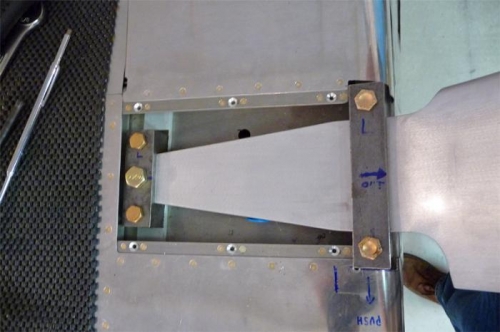
The ten main gear bolts are in! (Left side shown.)
|
|
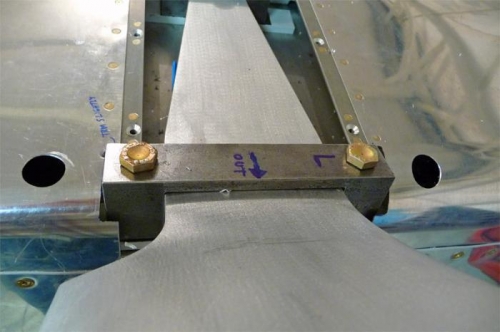
Access holes for the outboard wear-plate nuts.
|
|
|
|
|
|
|
|
|
Copyright © 2001-2024 Matronics. All Rights Reserved.
|