
|

|
|
|
Buck's RV-8
|
Date: 5-16-2007
|
Number of Hours: 2.50
|
Manual Reference:
|
Brief Description: Floorboards
|
|
Today I sat back and took stock of a few things. I wanted to reassure myself that I'm on the right track with a couple of issues -- namely, how the nylon flap actuator blocks, floorboards, and cockpit side panels will be installed. Since I want to be able to pull the floorboards out of the plane easily at any time, without removing the control column, flap actuator arm, or anything else, I have to modify a few things.
I ended up cutting out two rectangular notches from each of the forward floorboard segments. One is for the end of the control column hanger, and the other (the one at the corner) will allow the floorboard to slide into place without having to be bent too much. I'll also have to cut out a small part of the aft floorboards, around the aforementioned flap actuator mount.
Installed most of the remainder of the floor platenuts, including a few tough ones. I used a couple of Cherry Max "platenute rivets." I also installed the two right-side flap-block platenuts (the ones that will take the AN-3 bolts). After looking at it for a while, I've decided to simply bolt the left-side blocks to the floor supports, and not use platenuts. My Reasons -- a). Simplicity, and b). I goofed up the placement of the left platenuts. Optimistically, I then decided to re-drill them in a different location. The second pair of holes were too close to the skin. I tried filing off some of the platenut to make it work, but I wasn't happy with the results. So, no platenuts for that side.
I wanted to drill the control column hanger and spacers today, but I didn't have a long #11 drill bit that would fit alongside the front seat belt attach points. I tried every combination of tools that I had, but I ended up just ordering a 6-inch long #12 bit from Avery.
|
|
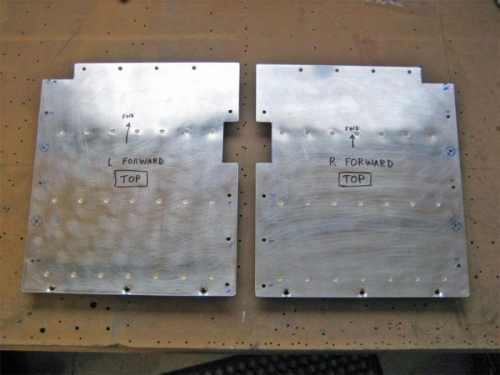
The forward floorboards, showing the notches I cut to make them easier to get in and out.
|
|
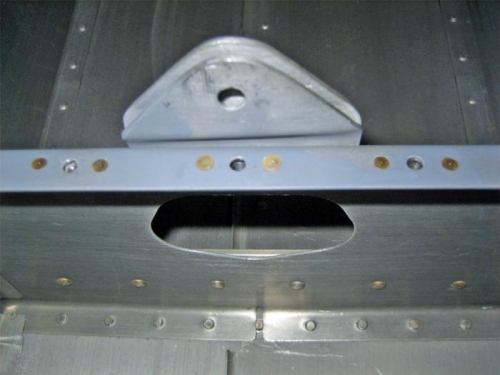
Platenut in front of seatbelt attach point was not as easy to install as I thought it would be.
|
|

A couple of platenuts, like the left one, required the use of a Cherry Max "platenut rivet" or two.
|
|
|
|
|
|
|
|
|
Copyright © 2001-2024 Matronics. All Rights Reserved.
|