
|

|
|
|
Buck's RV-8
|
Date: 11-15-2007
|
Number of Hours: 3.10
|
Manual Reference:
|
Brief Description: Rear seat throttle
|
|
I began this evening's work by drilling the throttle cover plate for the platenuts, then I scuffed, cleaned, and primed the plate. Once it was dry, I installed the platenuts.
Next, I cut off 1" of the top of the throttle arm, re-drilled a new 3/16" hole for the knob about 5/16" down from the top, and bent the arm. (I bent it to about 60 degrees instead of the angle specified -- I think it looks better, and will prevent the rear seat occupant from getting his/her hand pinched.) I fitted the arm to the plate with the required hardware, and decided to file another 1/16" from the inside edge of the slot in the armrest.
After drilling the attach holes in the UHMW strips, I clamped the strips to the armrest and drilled through them into the armrest. Then I removed the strips, countersunk the holes in them, and deburred and dimpled the holes in the armrest. I had to use a pop-rivet dimpler tool for this task.
When the plate was screwed in place, I noticed there was a gap between the throttle plate and the vertical bulkheads. The gap was only on the fore and aft side of the plate (not the top), and was a result of the way the QB fuselage was put together at the factory. I decided to fabricate a couple of shim strips from 0.063 aluminum stock. This did the trick. Everything fits well now.
|
|
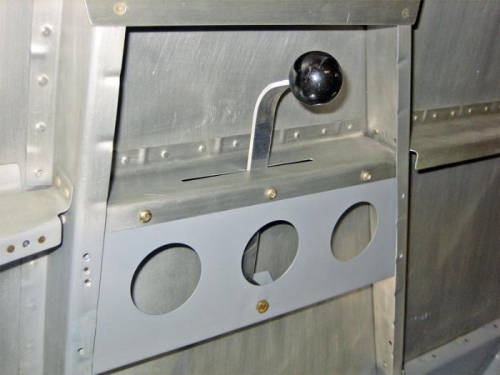
Testing the fit and bend-angle of the throttle arm.
|
|
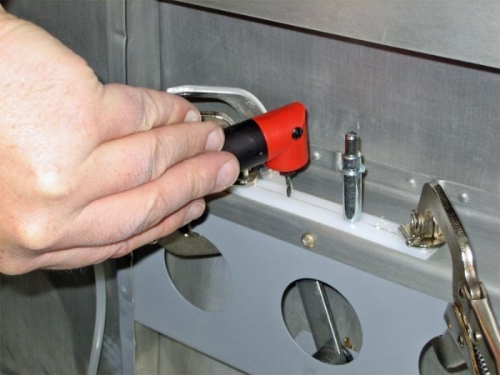
Drilling the UHMW strips to the armrest.
|
|
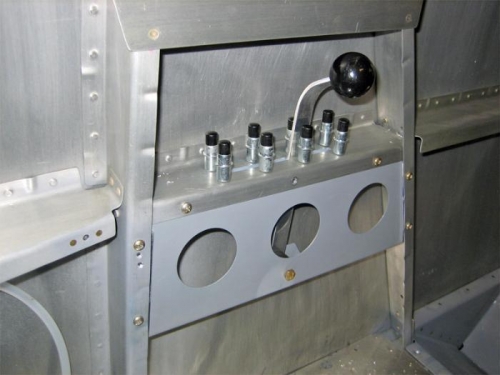
Throttle quadrant fully assembled except for the UHMW strips, which are clecoed in place for now.
|
|
|
|
|
|
|
|
|
Copyright © 2001-2024 Matronics. All Rights Reserved.
|