
|

|
|
|
Buck's RV-8
|
Date: 11-7-2007
|
Number of Hours: 4.50
|
Manual Reference:
|
Brief Description: Front seat; rear seat
|
|
I pulled all the front seat parts out of the paint booth and riveted them all together. Presto -- a seat! (I still have to set a couple of rivets along the sides. I'll be borrowing a longeron yoke for my squeezer from a friend tomorrow.)
Next, I fabricated both rear-seat attach pins (each is 6-1/2" long, plus 3/4" for a "handle"), and installed the rear seat so I could begin fitting the fiberglass top.
As with many of the fiberglass parts in an RV kit, it did not fit well at all. I marked and trimmed the bottom and side edges until it would fit the seat back (somewhat), then marked and trimmed off the top edge so it would clear the seatbelt slots in the bulkhead. After that, it was just a matter of fitting, trimming, and filing -- again and again until it fit. My Dremel tool, portable belt-sander, and hand files got a good workout today. The critical parts of the rear seat are done -- now it'll be a matter of fine-tuning everything, attaching the support-angle and doublers, and building up some parts of the back of the seat with resin and flox to prevent excessive rubbing on the aluminum bulkhead structure.
The fitting process is pretty straighforward. It just takes time. Don't forget to wear a dust mask. My hangar and clothes were covered with fine dust when I was done. And I smelled like resin.
|
|
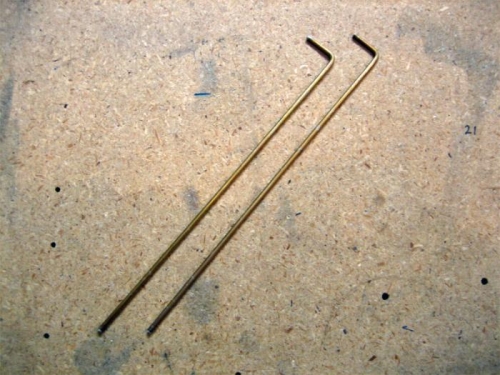
Rear seat hinge pins, 7-1/4" long total, including handles.
|
|
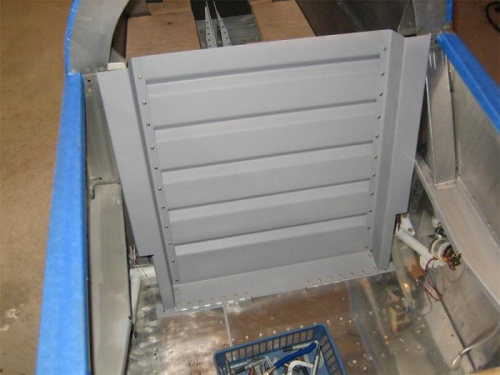
Rear seat back.
|
|
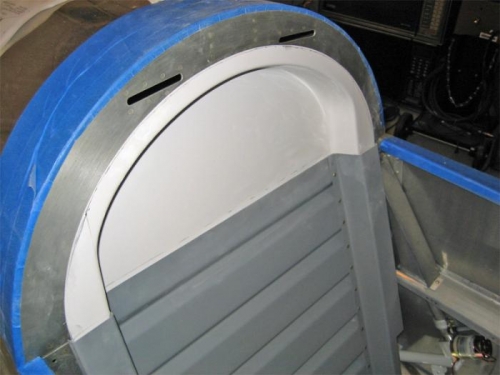
The fitted fiberglass cap, after 3 hours of trimming and fitting.
|
|
|
|
|
|
|
|
|
Copyright © 2001-2024 Matronics. All Rights Reserved.
|