
|

|
|
|
Buck's RV-8
|
Date: 10-20-2008
|
Number of Hours: 3.10
|
Manual Reference:
|
Brief Description: APRS final assembly and testing
|
|
I completed the assembly of my APRS unit by completing the power wiring, securing all the internal hardware with Loctite, and cutting a viewing window in the top of the case. I glued a sheet of Lexan to the inside of the lid, over the hole. This will allow me to check the three status LEDs inside while I'm programming and testing the unit.
I installed the unit in my truck and drove around town for a couple of hours, and got pretty good results. It think it'll work very well from the air. I tweaked the settings this evening, and I'm looking forward to testing the improvements tomorrow. (Of course, these settings will be modified further when I actually install it in the airplane.)
I figured out that antenna placement has a huge impact on the number of successful "hits" I was making to local i-gates/digipeaters. The large, vaguely S-shaped zig-zag seen in Photo #2 reflected the track that was recorded with the antenna laying on the floor in the back of my truck. The east-west track was recorded later in the day, when I had the antenna taped to the window.
|
|
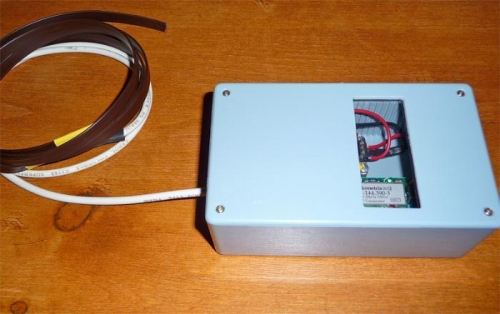
The APRS unit, with its J-Pole antenna attached. Hard to see, but there's clear plastic in the window.
|
|
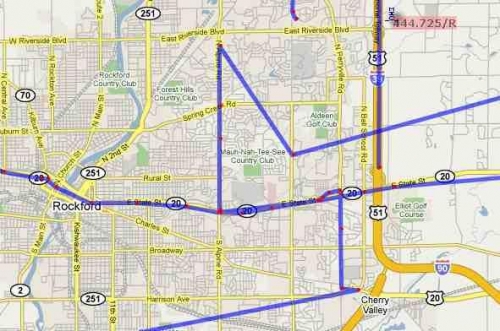
Some of my first tests with the APRS.
|
|
|
|
|
|
|
|
|
Copyright © 2001-2024 Matronics. All Rights Reserved.
|