
|

|
|
|
Buck's RV-8
|
Date: 8-12-2007
|
Number of Hours: 2.90
|
Manual Reference:
|
Brief Description: Wiring conduit; landing light
|
|
Finished installing the wiring conduit in the right wing. Squeezed a bead of RTV around the conduit where it passes though each rib, to prevent chafing.
Cut the landing light hole in the leading edge of the right wing. As with the left wing, I used a Dremel tool with a cutoff wheel for the main cutout, then used a 2" sanding drum to get within about 1/32" of the line, then finished off the edges with a 2" Scotchbrite wheel.
Next, I used the template to locate, drill, and cleco the top and bottom lens mounting strips to the wing skin. After marking the strips with an etching pencil (so I can orient them correctly later), I polished the edges of the strips.
Located, marked, and drilled the holes for the 4 platenuts on the ribs.
By the way, I met the founder and owner of the Duckworks company, Don Wentz, at Oshkosh. He's a great guy -- very personable and smart. I mentioned that I might install an extra set of platenuts on the ribs so that I could adjust one of the lights downward and use it as a taxi light. He said that was unnecessary -- the HID lights are so bright, they can be used as either taxi or landing lights with no change in mounting angle. Cool!
|
|
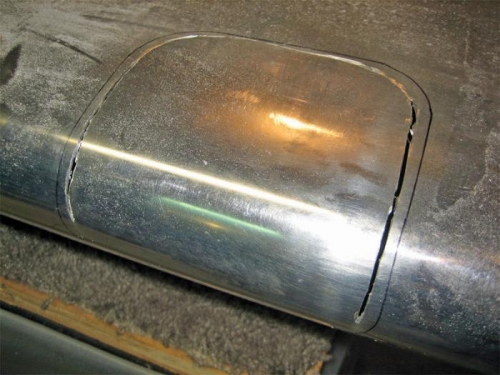
Making the cut in the leading edge of the wing. (Wing is upside down!)
|
|
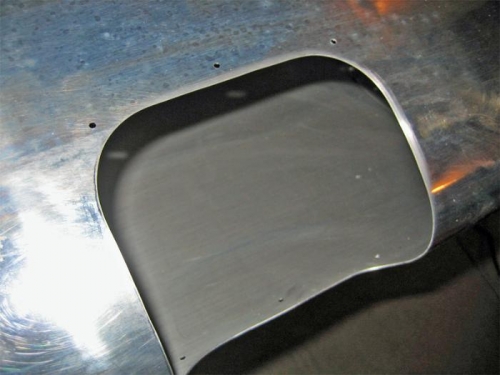
The finished cutout, with the attachment screw-holes drilled.
|
|
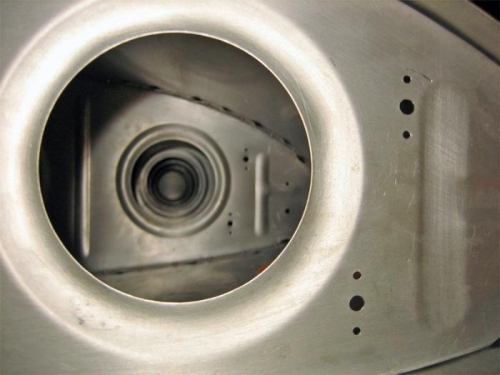
The holes for the platenuts that will mount the light assembly to the ribs. (Wing is right side up.)
|
|
|
|
|
|
|
|
|
Copyright © 2001-2024 Matronics. All Rights Reserved.
|