
|

|
|
|
Buck's RV-8
|
Date: 12-30-2014
|
Number of Hours: 3.50
|
Manual Reference:
|
Brief Description: R flap
|
|
This was a nice, productive day. After a lot of reading and consideration, I decided to go with a modified flap rod attach point for the flaps. The stock, studded rod-end bearings simply will not work without creating another, larger problem -- namely, a tall hole in the fuselage that interferes with the flap fairing.
So I used a new straight rod-end, a pair of medium-sized 1/4" fender washers to capture the bearing, a 9/16" machined aluminum bushing from McMaster-Carr, and an AN970-4 fender washer with one side partially ground off. This setup accomplishes the same thing as the original, but moves the bearing about 1/2" further out from the flap. I think the load is reasonably distributed, and the stress points are minimized. Because I'm using an AN4 bolt as the main connector instead of the stock bearing stud, I was actually able to use a full-size AN365 nut on the inside of the flap rather than the thin-profile nut called for. Even better, I can still use the aftermarket Avery flap rod that I wanted to use.
I cut and gound down a cheap 7/16" wrench to more easily reach the nut inside the flap. This makes the job a lot easier than what I've been doing. You don't want to know.
I mounted the flap, installed and adjusted the flap rod, trimmed the flap hole to its final size and shape, and connected everythingl up. The excitement of the night came when I ran the flap up and down using the electric motor! What a great feeling to see that happen!
To celebrate, I took off the flap and trimmed the inboard top skin to its final shape, which I derived from a plastic French curve tool that I bought at Hobby Lobby. Aesthetically, it now looks "right."
|
|
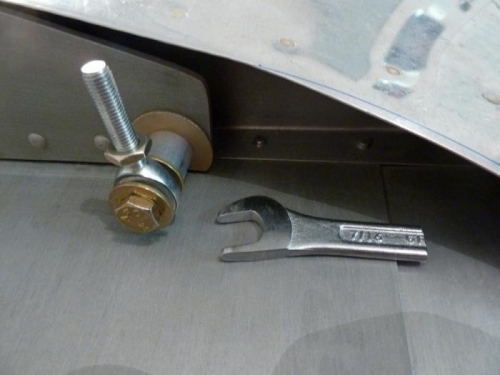
The new, modified flap rod attach point, and my modified wrench.
|
|
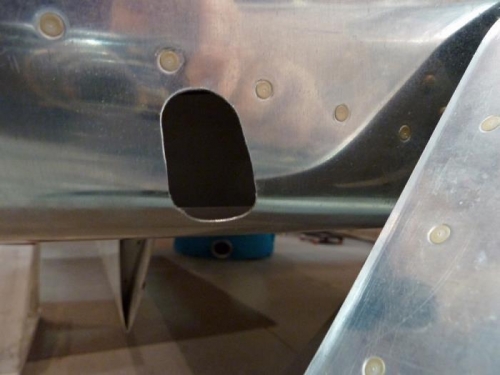
The right flap rod hole, in its final form. Just needs to be filed and sanded a bit.
|
|
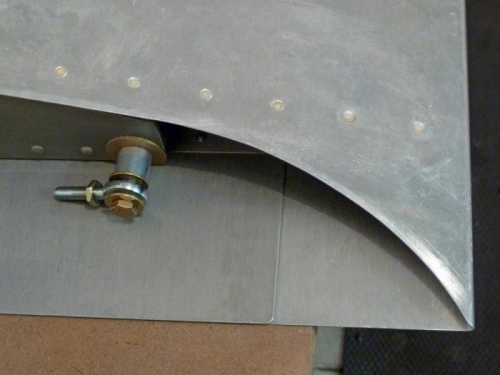
The final profile of the flap. Drawn with a French curve template.
|
|
|
|
|
|
|
|
|
Copyright © 2001-2024 Matronics. All Rights Reserved.
|