
|

|
|
|
BOB'S WEB SITE
|
Date: 8-2-2020
|
Number of Hours: 3.00
|
Manual Reference: Section 37
|
Brief Description: Trimming the top cowl
|
|
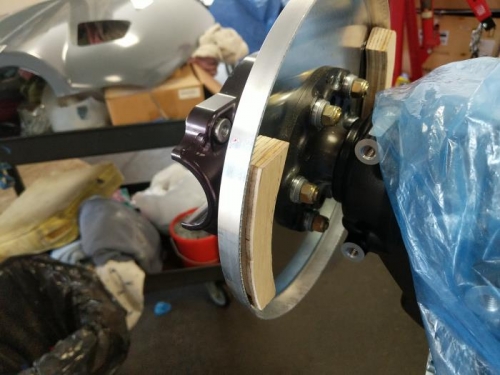
I picked up some two-sided tape from Home Depot so I could secure the spacer blocks behind the rear spinner plate, confirmng that I will have a 3/8 gap behind the spinner. Then started fitting the top cowling and aligning it.
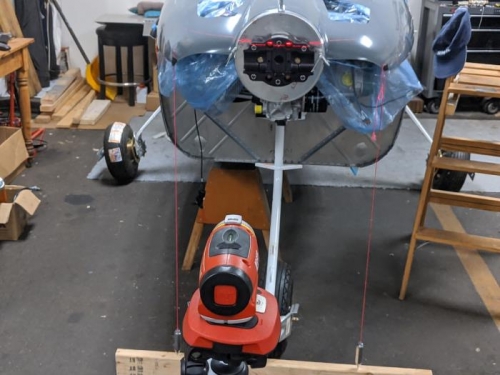
I didn't really like the Vans method of lining up the RV-12is cowling laterally prior to drilling hinge holes, which involves dropping plumb bobs from the front corners to a level, marking points on the corners and on the level, then measuring the distance between the two marks.
If both sides are the same, it's laterally aligned.
And that's fine.
I like the cowl sitting naturally on the hinges and lining up nicely around the spinner plate, then using a laser level to establish a centerline of the cowling that matches the centerline of the prop hub and aircraft centerline.
Those corners you sand to the scribe line and if you're off then you're going to be off laterally.
I also find comparing the back corners in relation to the top of the lowermost hinge, provides additional reference.
When sanding the aft edges, get the top and middle to fit with no gap, then the side bottoms. The reference line on the bottom corners changes slightly as the top drops into place .
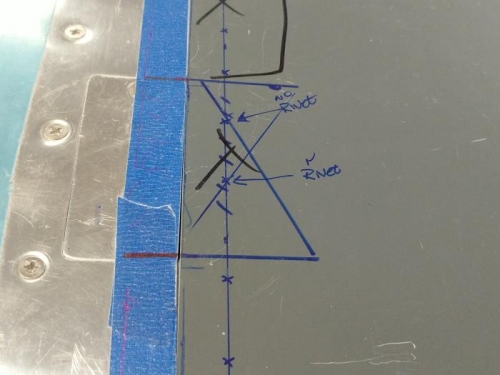
Once I was satisfied with the fit -- no gaps -- I marked 9/16" from the forward edge of the fuselage skin, and then marked a rivet line, with rivets every 1" starting 1/4" from the edge of a hinge.
Next step is to remove the cowling and drill the holes, make some sort of support block while match drilling things.
|
|
|
|
|
|
|
|
|
|
|
|
|
|
|
Copyright © 2001-2024 Matronics. All Rights Reserved.
|