
|

|
|
|
Joe's RV-10 Adventure
|
Date: 1-5-2007
|
Number of Hours: 2.00
|
Manual Reference:
|
Brief Description: Glued in Ribs Into Trim Tabs
|
|
Today, after first cleaning the carport up a little, I set up everything to glue (Pro-Seal) in the three foam ribs into the trim tabs. I found it kind of weird that they are not evenly spaced, but that is what the plans call for. I guess they are positioned closer to the horn end because that is where the bending loads will be, plus there will be a full length piano hinge on the top to secure it to the elevator. Anyway, I started out by re-cleaning the inside with acetone to make sure that the Pro-Seal would adhere properly. Next I cleaned a scrap piece of would that I would use to mix the Pro-Seal on. After mixing the two parts of the Pro-Seal together, I used the 1 1/4" wallpaper roller to load up the Pro-Seal and then applied it to the foam ribs. This makes a nice even coat and saves Pro-Seal I think. I was able to put enough Pro-Seal on all six ribs and had some left over out of a one and one half ounce jar. After applying the V clips that I made last week and clecos, I was going to blind-rivet the end tabs together as called for in the plans. I realized that something was amiss when the pop-rivet called for was a countersunk style. I think there is a problem in the plans because it does not specify to dimple the #30 holes in the ends. There is a sentence about dimpling all the holes in the skin and goes onto specifically mention the holes where the horns are riveted to the skins but nothing about the end tabs. I thought that the countersunk pop-rivet might self-dimple so I tried one. Of course that didn't work. It sticks out about 1/64 to 1/32' out. I called Van's and they said it was just cosmetic and that I would still have clearance. He also suggested that I use a regular (non-countersunk) pop-rivet. So on the inboard end where I know there is plenty of clearance, I used a LP4-4 which actually sticks out a little further than the non-countersunk countersink ones, but looks more finished and correct. On the outboard end, I used the countersunk style and figure with a little paint, it won't
|
|

Pro-Seal Setup With Roller
|
|
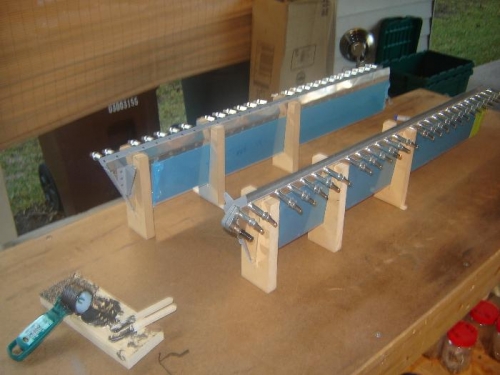
After Clips and Clecos Installed
|
|
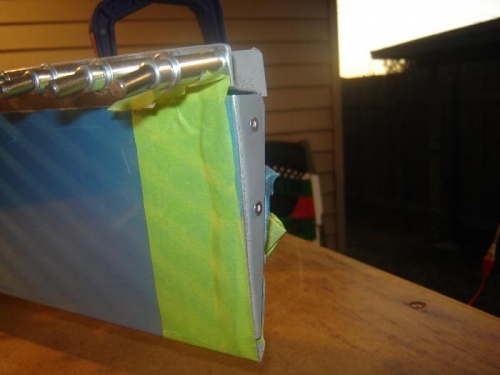
Trying to Show How Rivets Stick Out
|
|
|
|
|
|
|
|
|
Copyright © 2001-2024 Matronics. All Rights Reserved.
|