Brief Description: Building the DRDT-2 support table
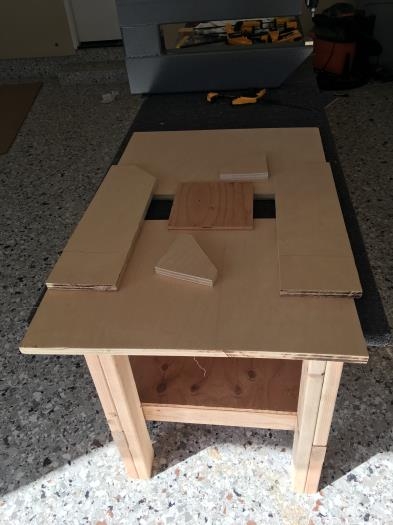
The DRDT-2 dimpler comes with plans for a support table. It calls out particle board for the material, but I've got a lot of leftover 3/4 in. and 1/2 in. plywood so I'll use that instead.
The assembly is pretty straightforward. Cut the pieces, glue and screw them together and cover it with carpet. Well, at least that's what I thought.
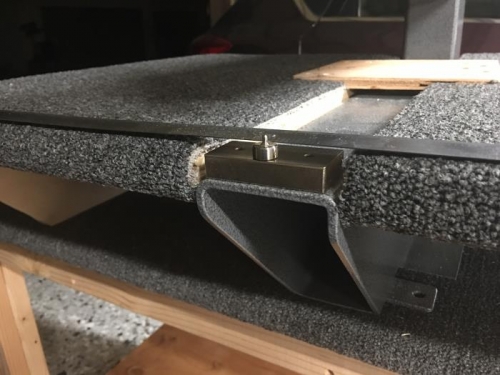
So I'm pretty much a measure 47 times, cut once kind of guy. The plans have some flag notes saying to double check the dimensions. The goal is to get the surface of the table even with the surface of the dimple. Typically it's the male dimple in the bottom (I think) so I checked all my male dimples and at least they're all the same height. I also have to consider the thickness of the carpet.
With all that in mind I proceeded to measure 16 times, check my math 14 times, measure another 32 times and I'm finally ready to go. (Hey! That's 48 times!)
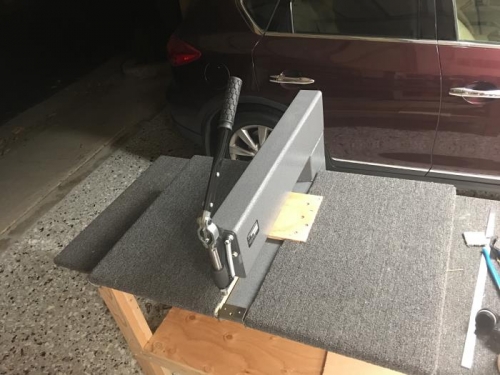
All that work paid off in the end. The surface of the carpet is within 1/16 in. of the dimple surface. The only thing that bothers me a bit is the width isn't as long as I had envisioned it. I know I'll have some long skins to dimple so I'm wondering if I should make a couple of auxillary tables to bookend the support table for those bigger skins. I might not have an extra set of hands available when the time comes to dimple those bigger pieces. Well, I'll save that for another day.
Pieces cut and ready for assembly.
Final product with the DRDT-2 dimpler ready to go to work!
All that measuring paid off. The dimple is almost perfectly level with the sheet.