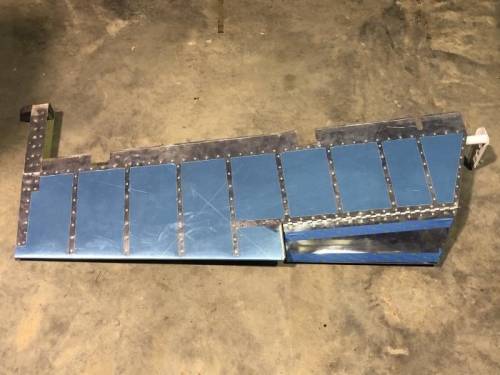
Brief Description: Left Elevator & Trim Tab Assembly
Completed the follow tasks on the left elevator and trim tab: * Cleco and rivet E-701-L and E-713 to the understructure. * Finish attaching E-714 * Complete the trailing edge bend of the E-619-1-020 trim tab skin. * Remove the vinyl from the ends of the trim tab and mark bend lines on the tab. While bending the tabs the bending blocks will move away from the bend line (toward the center of the trim tab). Compensate for this by offsetting the bend line approx. 1/32 from the desired bend location. * Bend the bottom tab down using the face of a block of wood, working progressively back and forth across the tab. Finish the bend by using a flush set and a rivet gun turned down low. Work the rivet gun across the entire tab without stopping. * With the block still clamped in place repeat the above steps to bend the upper tab up and over the bottom tab. * Repeat the above steps for the outboard tabs. * Cleco E-607PP to the inside bottom surface of E-619PP-1-020. * Clamp E-718 to E-717 and run a clevis pin through the clevis pin attach hole for alignment. Cleco the E-717 outboard horn to the trim tab skin. Using the holes in E-718 as a drill guide, match drill E-718 to E-619-1-020 and E-607PP. * Use the dimensions given on DWG 4 to position and clamp E-721 to the top flange of E-607PP. Mark the inboard edge of E-619PP-1-020 and E-607PP on E-721. * Drill the remaining holes attaching E-619PP-1-020 to the bottom flange of E-607PP. Drill the holes attaching E- 619PP-1-020 to the top flange of E-607PP and E-721. * Machine countersink the top of the E-607PP trim tab spar to accept the dimples in the trim tab skin. Dimple the bottom flange of E-607PP. * Trim off the excess material from the E-717 outboard trim tab horn and the E-718 inboard trim tab horn depending on the type of trim system used (See Manual Trim Assembly or Electric Trim Assembly, DWG 4). * Trim the inboard edge of the aft portion of the E-721 trim tab hinge. * Cleco the trim tab back together. * Rivet the bott