This is the rear baffle of the fuel tank and I had a heck of a time removing the plastic coating. Its been on there for about 15 years. But, I eventually got it off. The aluminum looks great still. I discovered earlier that leaving the plastic on can cause fit problems. The plastic has a thickness to it and when I was fitting the tank to the wing, it wouldn't fit up tight to the leading edge skin. I tried and tried to coax it to the right spot. Turns out there was some of the plastic on the inside skin of the tank that had scrunched up and was holding the tank from fitting tight to the leading edge wing skin. Another lesson learned. So I totally took the tank apart and removed all the plastic from all sides of the skins. Then it went together perfectly. That was a time consuming task.
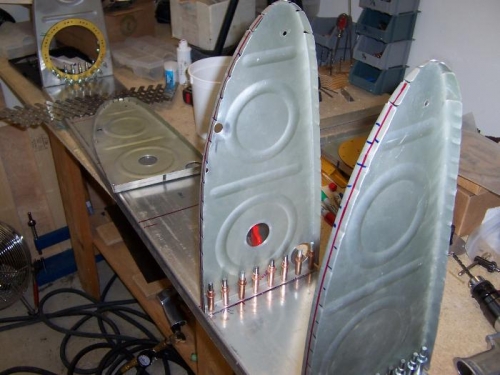
Earlier, I measured all the rib locations and marked the rear baffle. One at at time, I placed each rib on location, double checked alignment, clamped it and drilled the holes through both the rib and baffle. I used my rivet spacing tool to evenly spread the rivets. The outside and inside ribs get drilled #41. Plans call for flush rivet but I don't know why. The surface is not visible. I guess its so that you dimple both the rib and baffle for a stronger fit instead of AN470 rivets. All the inner tank ribs are drilled #30 for pop rivets when the baffle gets put on permanently as the last task. Placed the baffle and ribs onto the main spar. Ran a threaded rod through the tooling holes. Aligned each rib to the correct vertical position. Secured the ribs with zip ties on the theaded rod on each side of the ribs. Pulled the skin tight just like the leading edge skin process.
Eventually you get a good run going without tearing.
Drill and clecoe the tank ribs to the rear baffle.
Pulling the skins into positon for drilling the ribs.