
|

|
|
|
Wendells RV-6A
|
Date: 4-27-2009
|
Number of Hours: 6.00
|
Manual Reference: Measure and Mark
|
Brief Description: Set all ribs in place for drilling
|
|
We are getting a puppy to raise and train for a great organization, CCI -Canine Companions for Independence. Raise it for a year and one half and then it goes for some final training with CCI before it is given to a person in need, such as disabled adults, children, handicapped persons. We are excited to do this volunteer work as a way to give back to society. So, I will need to plan my time better in order to work on the plane when the pup is sleeping. So far so good.
I spent a LONG time measuring and marking the placement of ribs, putting skins on and off with clamps to check for alignment. My manual is missing pages that were supposed to help with sketches of how to plumb the rear spar correctly. Thankfully, Vans Air Force web site came to my rescue with scanned in sketches. The normal process was to drill a 1/16 inch hole in the main spar towards each end. Using the same distance starting from the outboard end of the spars, you are supposed to drill a 1/8 in hole in the rear spar and then drop a plumb line from the main spar down through the rear spar, centering the lines in the middle of the two 1/8 inch holes. Sketch said measure in from the outboard end 7 inches and 99 inches and mark. Then measure in 4 and 29/32 from the leading edge of the main spar and mark where it crosses the 7 and 99 in marks. Then go to the rear spar and measure 2 and 11/32 from the leading edge and mark like you did on the main spar. Drill the holes and away you go. Well, it occurred to me that if I just measure 2 and 9/16 from a plumb line ( hanging off the leading edge of the main spar) to the edge of the rear spar, you get the same plumb alignment and don't have to drill holes, etc. So, thats what I did. I cut a piece of angle and trimmed it to exactly 2 and 9/16 and used that as my guage. It worked great. Placed all the ribs, drilled them into both spars, drilled all the angles needed to reinforce the ribs and mounted everything. I felt GREAT seeing it come together.
|
|
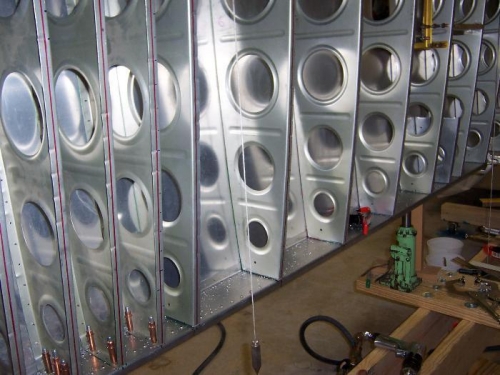
Set Wing Incidence with Plumb Bobs
|
|
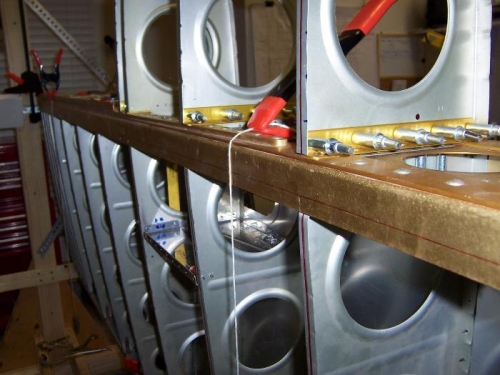
More ribs secured in place.
|
|
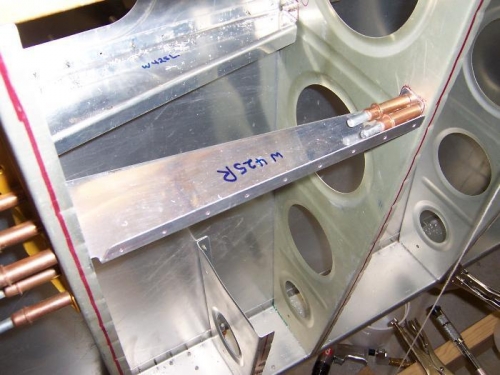
Preparing for Bell Crank in here.
|
|
|
|
|
|
|
|
|
Copyright © 2001-2025 Matronics. All Rights Reserved.
|