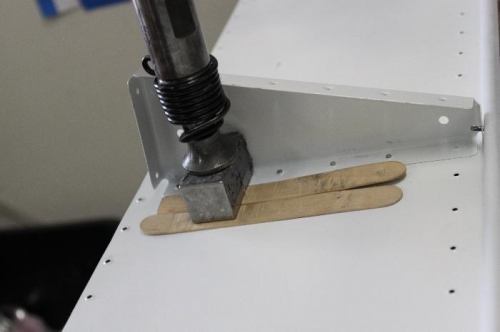
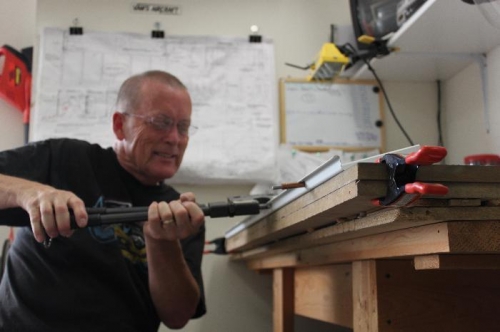
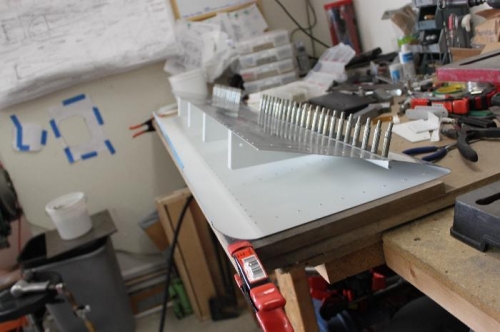
Finished one flap and this is the last (left) flap being riveted. First you rivet inner ribs to the bottom skin. I used a back rivet plate underneath and with 90 lbs I backriveted the ribs to the bottom skin. Need 90 lbs to transfer the energy through the bucking bar. Normally I would use 25 lbs on a direct hit for these AD3-3.5 rivets. Used a couple large craft sticks to protect the bottom skin whilie I riveted the ribs on. You just hold your fingers onto the flush set to keep it in place as you pull the trigger. Keep the bucking bar kind of centered over the rivet so it doesnt tip to one side or the other as you hit it with the flush set. One thousand one and its done. Hand squeeze the AN470AD4-4 in the rear of each rib. Then, slip the top skin in place, cleco the overlap together and rivet the overlap except for the outermost holes. Save those until you put the outermost ribs in place later. Plans call for AN426AD3-3 for the overlap skins. I found the 3-3.5 gave a better shop head. Sometimes the shorter AD3-3 almost disappear into the dimple and when you check with the rivet guage you see that the AD3-3.5 is the correct length plus I used AD3-4 when I came to each rib flange. Next will be turning it over, clamping it down and clecoeing the top skin to the inner ribs for riveting next.
Use titanium bucking bar to backrivet flap ribs
Squeeze the AN470AD4-4s at the rear of each rib.
Leave the top side unclecoed while you set the overlapping skins. Easier to position bucking bar.